If you need to allow another user to send messages under the name of another mailbox, you can can grant ‘Send as’ permission.
When a user has ‘Send As’ permission they will be able to send an email using the name of the other mailbox. Any replies to the message will go to the other mailbox.
This is typically given to shared mailboxes, to centralise any replies to the sent messages.
How to grant ‘Send As’ Permission (Using Exchange Management Console)
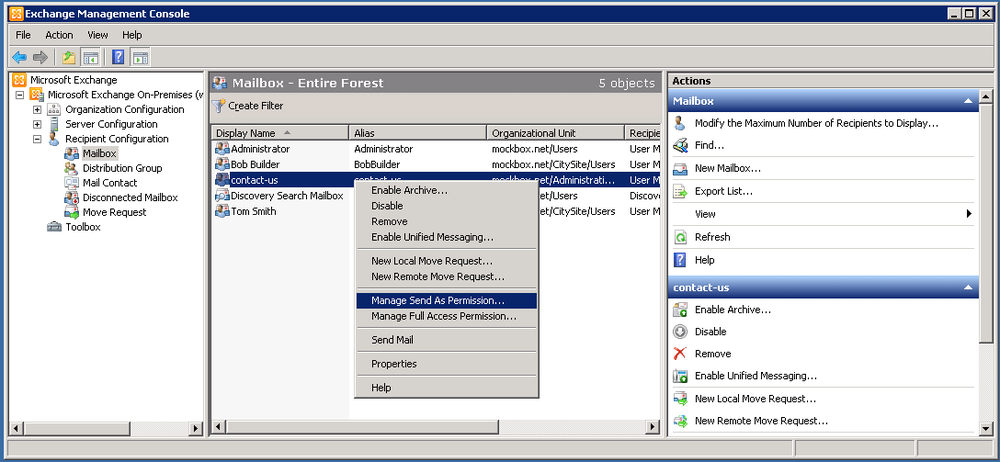
In this example we will be giving Bob Builder permission to send as the ‘contact-us’ mailbox.
- In the Exchange Management Console, expand the ‘Recipient Configuration’ node, and then select the ‘Mailbox’ node
- Right-click on the mailbox which the user will be sending from (e.g. ‘Contact-us’)

- Click on the ‘Add’ button
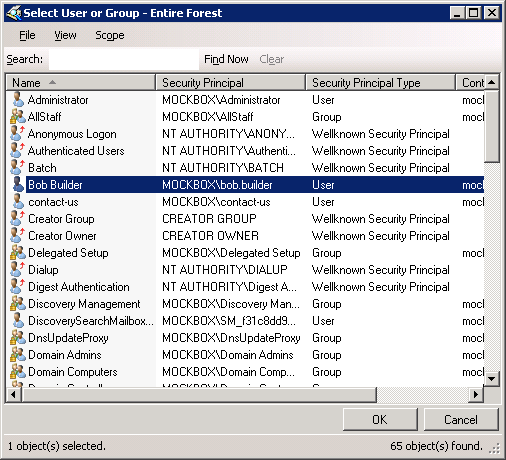
- Use the ‘Select User or Group’ window to search for the required user, select the user and click ‘OK’

- Click ‘Manage’ to apply the changes

- Click ‘Finish’ to close the wizard
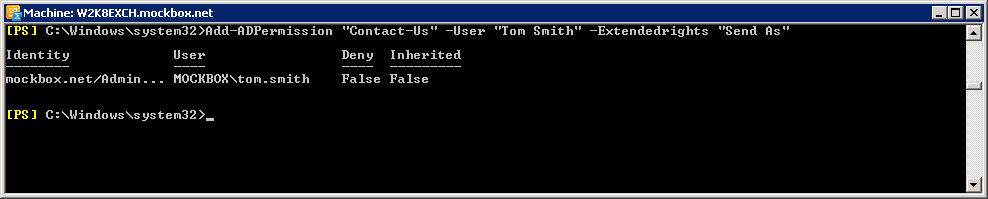
How to grant ‘Send As’ Permission (Using Exchange Management Shell)
The following Exchange Management Shell commandlet can be used to grant ‘Send As’ permissions for a mailbox.
In this example we will give ‘Tom Smith’ sendas permissions for the ‘Contact-Us’ mailbox.
Add-ADPermission "Contact-Us" -User "Tom Smith" -Extendedrights "Send As"