The Android operating system has a free emulator as a part of the development kit.
This emulator can be installed on any Windows computer and will allow you to operate a virtual phone for support and testing.
It may also be useful for testing how applications and websites work with each version of the Android OS.
Applies to Android based phones, i.e. HTC phones.
The following steps detail how to install the emulator.
- Download the latest Android SDK for Windows from http://developer.android.com/sdk/index.html
- Save the ZIP file to a convenient location and extract the contents
- Open the ‘SDK Manager’ application
- It will now attempt to access the Internet. If it fails to connect you will need to specify the proxy server in the ‘Settings’ tab
- Select the ‘Available Packages’ tab and then click ‘Refresh’
- Place a tick at the top of the list, this will select all available packages.
- Press the ‘Install Selected’
- Select ‘Accept All’ and then ‘Install’
- The packages will start downloading and may take up to 10 minutes to complete.
- Once finished, click on the ‘Close’ button
- Select the ‘Virtual Devices’ menu
- Click on the ‘New’ button
- Enter in the following information then click on the ‘Create AVD’button
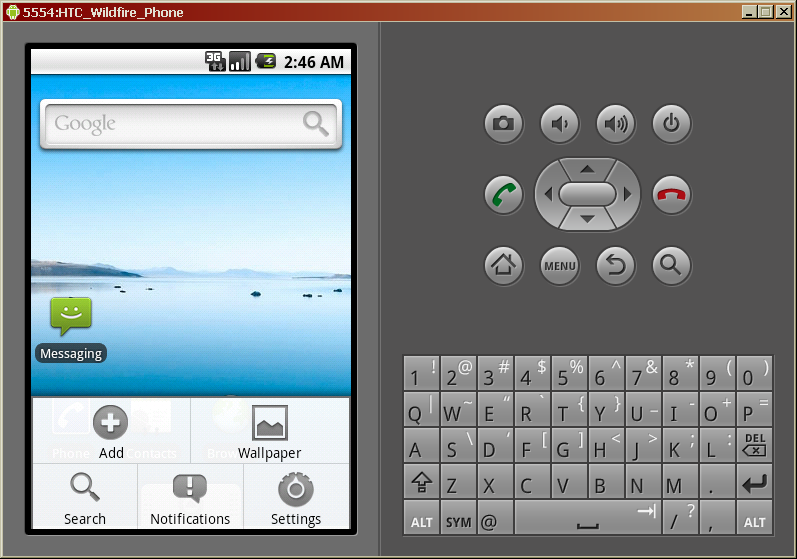
- a.Name: HTC_Wildfire_Phone
- b.Target: Android 2.1 –update1 – API Level 7
- c.SD Card Size: 1024
- Click ‘OK’
- Select the virtual phone. Click ‘Start’ button
- Select the ‘Wipe user data’ option
- Click on ‘Launch’ to start the phone –this may take a few seconds
If the virtual device can not access the Internet:
- Once the Android emulator is fully loaded, click on the ‘Menu’ button and then ‘Settings’ on the virtual screen
- Select ‘Wireless & networks’
- Check the ‘Airplane mode’ is not enabled
- Scroll to the bottom and select ‘Mobile Networks’
- Select ‘Access Point Names’
- Select ‘TelKila’
- Select ‘Proxy’ and enter your proxy server address
- Click ‘OK’
- Select ‘Port’ and enter the port your proxy server uses (e.g. 8080)
- Click ‘OK’
- Click on the ‘Home’ button to return to the home menu.
- You now have a functional virtual Android 2.1 phone