When Microsoft Word 2013 refuses to spell check it’s usually because it’s been disabled for the selected language in the particular document.
Some templates have this option enabled by design to hide the red or green underlines for words that aren’t in the default dictionary. This can result in spelling and grammar mistakes being released in the final document.
How to enable spell checking for a particular document
- Open the word document which is failing to spell check
- Select all the text by pressing Ctrl + A on the keyboard
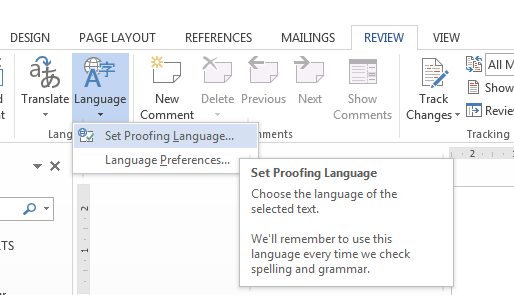
- Select the ‘REVIEW’ tab at the top of the window
- Click on the ‘Language‘ button then select ‘Set Proofing Language’
- Ensure the correct language is selected in the list and the ‘Do not check spelling or grammar’ option is not selected – empty, not ticked, not a blue square
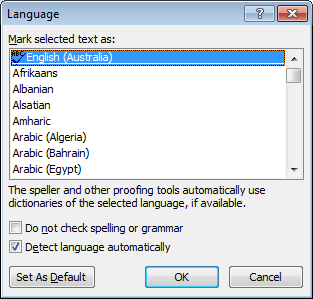
- Click ‘OK’ to save the changes
If this doesn’t resolve the spell checking issues you may need to enable spell checking from the options menu.
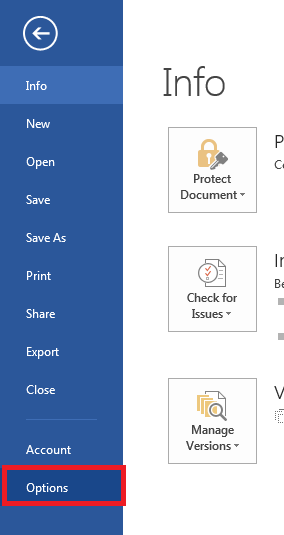
- With Microsoft Word open, select the ‘FILE’ menu then select ‘Options’
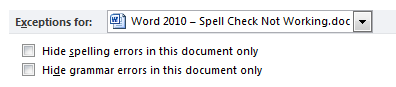
- Select ‘Proofing’ from the left hand menu
- Under ‘Exceptions for’ ensure that both options are not enabled.
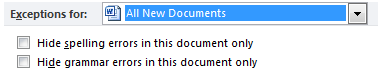
How to enable spell checking for all new documents
If you’ve found that all new documents have the spell check disabled, you can use these steps to enable the spell check by default.
- With Microsoft Word open, select the ‘FILE’ menu then select ‘Options’
- Select ‘Proofing’ from the left hand menu
- Under ‘Exceptions for’ select ‘All New Documents’
- Ensure that both options are not enabled
Doesn’t work
thanks for this fix.
Thank YOU !!!!!!