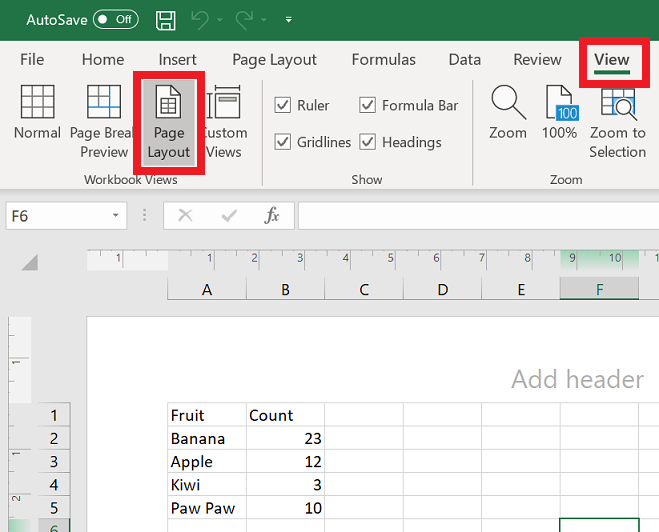
The following steps show how to edit a worksheet header/footer in Microsoft Excel.
- With the Excel document open, click on ‘View’ in the ribbon
- In the ‘Workbook Views’ group click on ‘Page Layout’
- The Excel document will now be displayed on a virtual page – with a header and footer
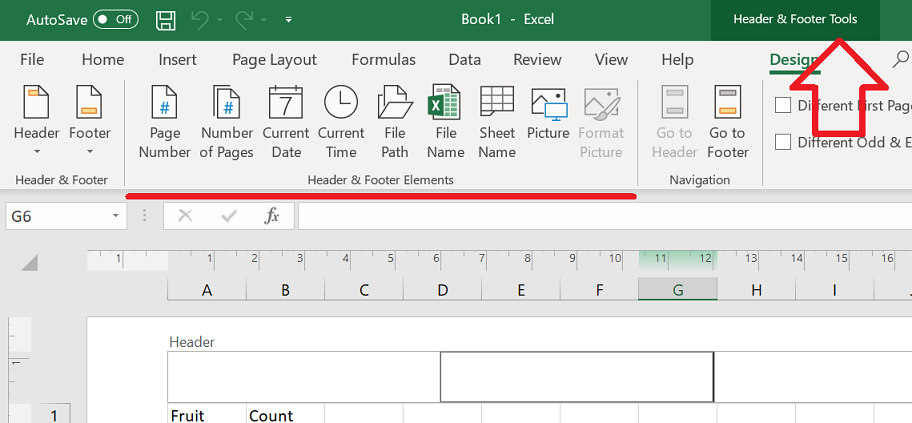
- To edit the header/footer – click on ‘Add header’
- You can now add text and formatting to the header
- If you want to add “smart” parts such as the date, page number or file path – click on ‘Header & Footer Tools’ at the top of the window
- These are found in the ‘Header & Footer Elements’ group
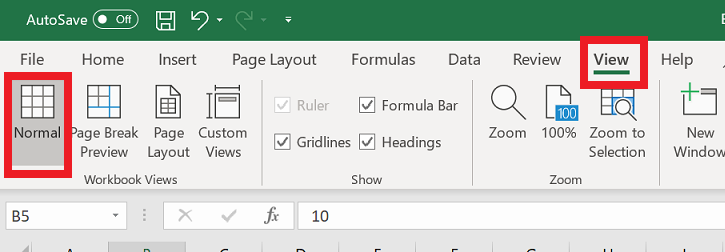
- To return to the normal view – click on the ‘View’ ribbon, in the ‘Workbook Views’ group click on ‘Normal’
Please, please, please, don’t tell me to go to the Insert Menu and click on Header and Footer. THERE IS NO HEADER/FOOTER OPTION IN MY INSERT MENU.
Besides, I HAVE a header already in place! I want to change it! It has three boxes, I want two. It has a right aligned text situation. I want the text to be Left aligned. Also, it is too wide, and does not align with the page margins! I want to make it do so. I already have checked the option to flow with the page margins, when I can find that option!~ Keeps disappearing! Let’s just start with that! No instructions that I find, even inside the program match what I”m seeing! And I can’t get anyone to assist me!