The following guide shows how to use checkboxes in your Excel documents.
On this pageJump to a section
This guide uses the form control method to handle checkboxes – not the ActiveX method that is more complicated to use.
Step 1: Adding a Checkbox
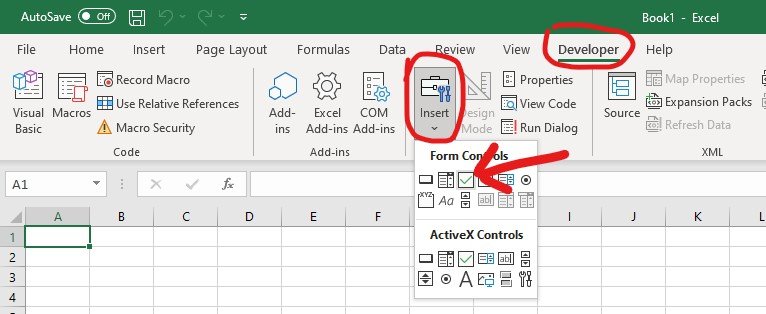
- Open Excel and navigate to the Developer tab.Note: If you can’t see the Developer tab, right-click on the ribbon and select Customize the Ribbon…. In the dialog that appears, check the Developer box in the right column.
- Within the Controls group, click on Insert.
- Select Check Box under Form Controls.
- Click on the cell where you want the checkbox.
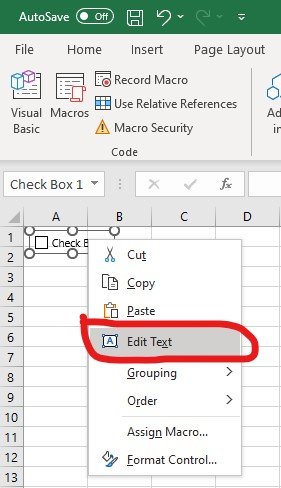
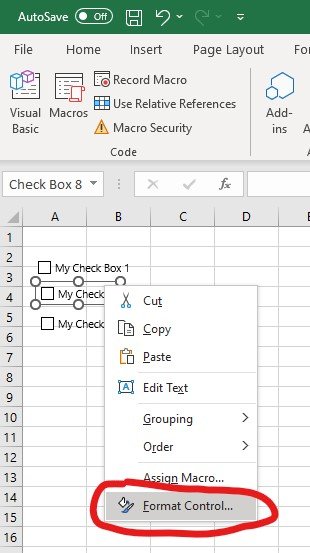
- To change the checkbox caption (the text beside the checkbox), right-click on the checkbox and choose Edit Text
Step 2: Inserting Multiple Checkboxes
To add more checkboxes:
- Press and hold Ctrl on your keyboard
- Using your mouse, hover over the checkbox until you see a + plus icon
- Click and drag to where you want the new checkbox
Note:
- Copied checkboxes will have the same caption but different backend names.
- If the original checkbox is linked to a cell, all copied checkboxes will link to the same cell. You’ll need to change this manually for each checkbox.
Step 3: Changing Checkbox Name and Caption
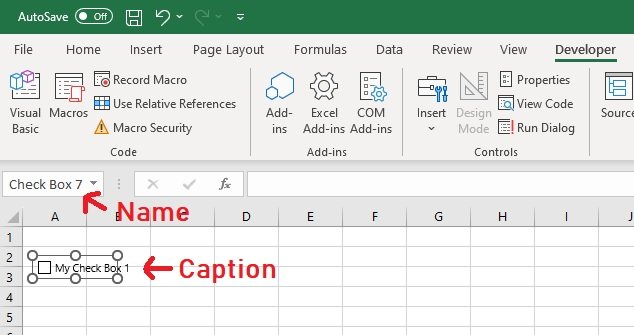
In Excel, checkboxes have both a name and a caption.
Here’s how to change them:
- The caption is the visible text next to the checkbox. To change the caption, right-click on the checkbox and choose Edit Text
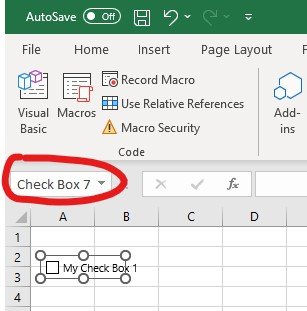
- The name is the back-end reference to the checkbox that Excel uses, for example in formulas. To change the checkbox name, select the checkbox by holding Ctrl on your keyboard and click on the checkbox.
- Type in the Name box
Note:
- Changing the caption name doesn’t change the actual name of the checkbox.
Step 4: Formatting Checkboxes
You can make limited changes to the checkbox formatting:
- Right-click the checkbox and click Format Control.
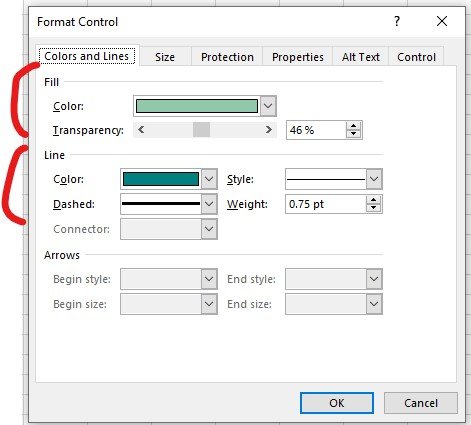
- Open the Color and Lines tab, select your desired fill and line colors.
Note:
- For more formatting options, such as changing the font type, size, or style, use the ActiveX control method (not covered in this guide).
- The Size tab allows you to change the checkbox’s size.
- The Protection tab lets you lock and unlock checkboxes (you’ll need to protect the sheet for this to take effect)
- The Properties tab lets you position a checkbox within the sheet.
- The Alt Text tab, you can specify the alternative text for the checkbox, and the Control tab lets you set the initial state for the checkbox. To link a checkbox to a specific cell, enter the cell address in the Cell link box.
Optional: Deleting a Checkbox
If you need to delete a checkbox:
- Hold Ctrl on your keyboard and click on the checkbox.
- Press the
Deletekey on your keyboard. - To delete multiple checkboxes, select them as described above and press
Delete. - To delete all checkboxes, navigate to , and press
Delete.
Note:
- You can delete multiple checkboxes by navigating to Home > Editing group > Find & Select > Go To Special, and select the Objects radio button
- However, be cautious when using this method because it deletes all objects in the active sheet, not just checkboxes.
Considerations
- It’s crucial to differentiate between the checkbox’s name and its caption name. The caption name is the text you see next to a newly added checkbox, such as Check Box 1. To change the caption name, right click the checkbox, select Edit Text, and type the name you want. The checkbox’s name is the name you see in the Name box when the checkbox is selected. To change it, select the checkbox, and type the desired name in the Name box.
- When copying a checkbox to multiple cells, remember that the linked cell for each copied checkbox will be the same as the original. If you need different linked cells for each checkbox, you’ll need to adjust these individually.
- Be cautious when deleting all checkboxes on a sheet, as this method will also delete all other objects in the active sheet, such as buttons, shapes, charts, etc.
- Checkboxes can be either of type Form control or ActiveX control. Form controls are simpler and more