When you’re researching online, you may want to capture a screenshot of a website for various reasons, such as for documentation, sharing with colleagues, or even as part of a blog post.
On this pageJump to a section
In this guide, we’ll explain how to do website screenshots using three popular browsers: Google Chrome, Mozilla Firefox, and Microsoft Edge.
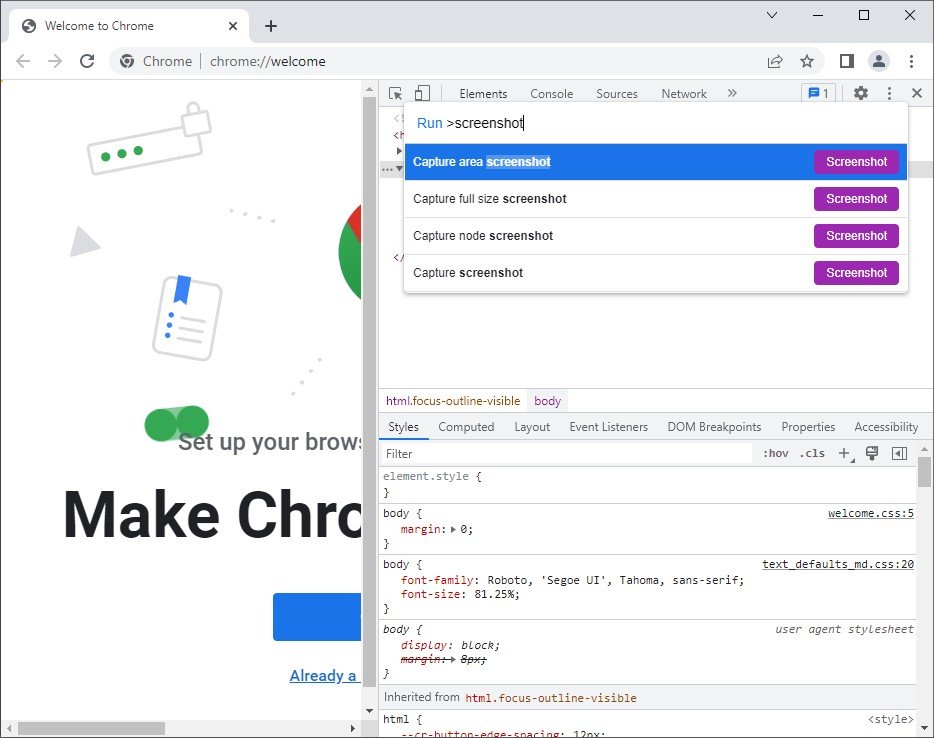
Google Chrome
- Open the Google Chrome browser and navigate to the website you want to capture.
- Press Ctrl + Shift + I (or Cmd + Option + I on a Mac) to open the Developer Tools panel.
- Press Ctrl + Shift + P (or Cmd + Shift + P on a Mac) to open the Command Menu.
- Type “screenshot” in the search box and select the screenshot type you want to take from the options:
- Capture area screenshot,
- Capture full size screenshot, or
- Capture node screenshot.
- The screenshot will be saved to your default downloads folder as a PNG file.
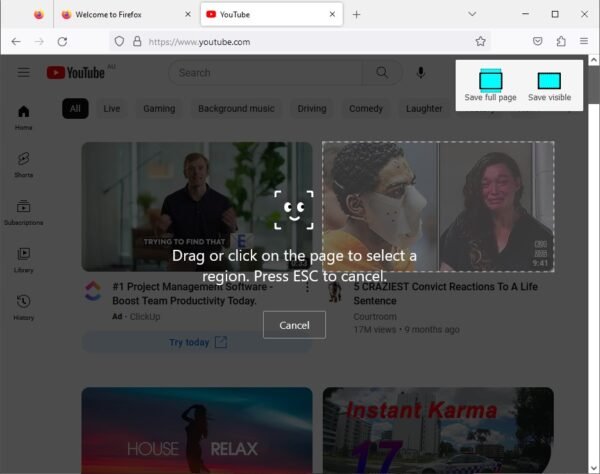
Mozilla Firefox
- Open the Mozilla Firefox browser and navigate to the website you want to capture.
- On your keyboard, press and hold Ctrl + Shift + S
- Choose between
- Save full page
- Save visible
- Follow the on screen prompts, to select the area to capture
- Click on the ‘Download’ button
- The screenshot will be saved to your default downloads folder as a PNG file.
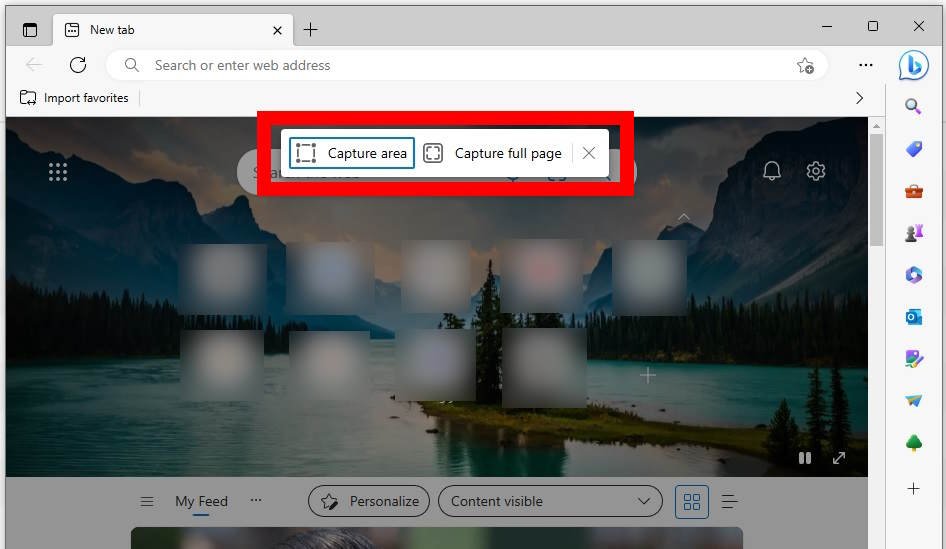
Microsoft Edge
- Open the Microsoft Edge browser and navigate to the website you want to capture.
- On your keyboard, press and hold Ctrl + Shift + S
- Choose between
- Capture area
- Capture full page
- Follow the on screen prompts, to select the area to capture
- The picture can be modified before saving – for example use the ‘Draw’ tool to highlight information and the ‘Erase’ tool to remove information

- The screenshot will be saved to your default downloads folder as a PNG file or copied to your clipboard, depending on your selection.