This following PowerShell command exports a folder tree from a specified directory to a CSV file.
The command will:
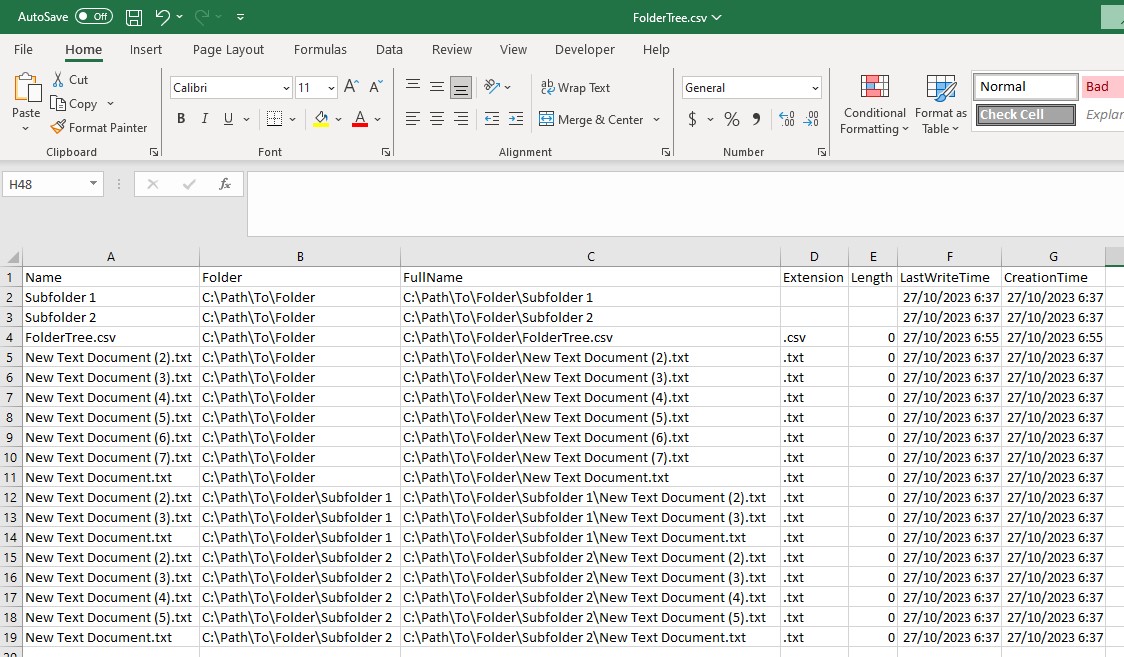
- Scan the current directory and its subfolders for files and folders,
- Create a new CSV file named
FolderTree.csv, - List all the items found in the directory structure,
- Display various details such as file types, file sizes, and the dates of last modification and creation for each item,
- Show the folder path for each item,
- Save the CSV file in the current directory.
Requirements
- PowerShell 5.1 or later
How to Run the Command
- Open PowerShell:
- On Windows 10 or 11, right-click the Start button and select “Windows Terminal” or “PowerShell”.
- On earlier versions of Windows, you can search for PowerShell in the Start menu or screen.
- Navigate to the desired directory by using the
cdcommand followed by the path to the directory:cd "C:\Path\To\Folder"
- Run the following command:
Get-ChildItem -Recurse | Select-Object Name, @{Name='Folder'; Expression={Split-Path -Parent $_.FullName}}, FullName, Extension, Length, LastWriteTime, CreationTime | Export-Csv -Path ".\FolderTree.csv" -NoTypeInformation
This command will start the process of scanning the current directory and its subfolders, and exporting the folder tree to a CSV file named FolderTree.csv in the current directory.
Caution
- Execution Time: This command might take some time to execute if the current directory has a large number of files and subfolders. Be patient and allow the command to complete its execution.