
The steps below show how to change the Windows 10 clock to 24-hour format.
How to change Windows 10 time to 24-hour format
-
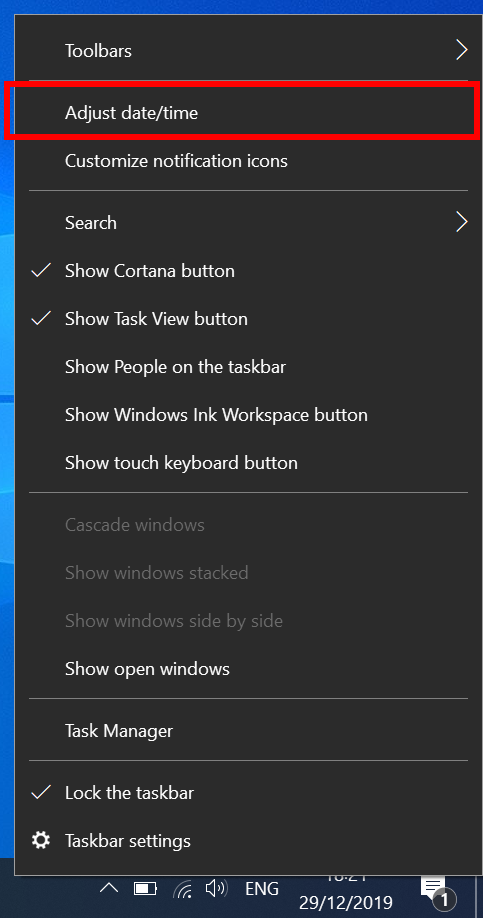
- Right-click on the clock at the bottom right of your screen then click on ‘Adjust date/time’
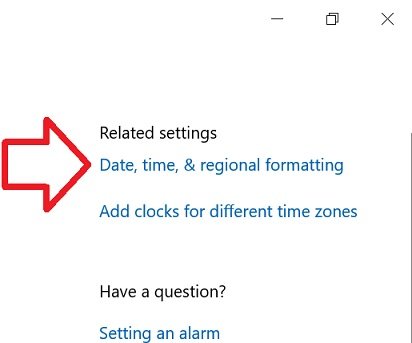
- In the right side of the window, click on ‘Date, time, & regional formatting’
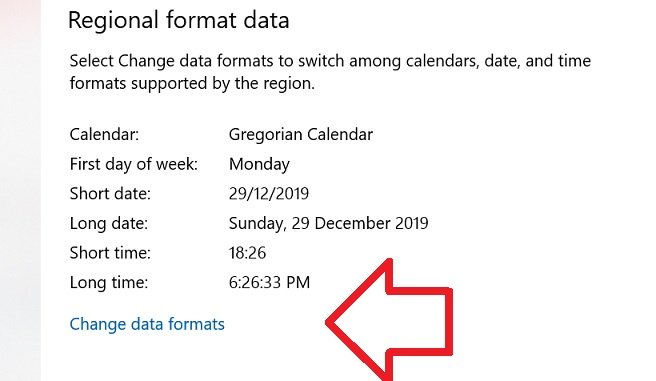
- Scroll down to the bottom of ‘Regional format data’
- Click on ‘Change data formats’
- Under ‘Short time’ select ‘9:40’

- Close the window
- Your time will now be in 24-hour format

I agree with the other comments here, why would the system deviate from the most commonly used format titling like “24-hour clock”, and also give the worst example of how the change works? Why use AM times when trying to showcase something that only takes effect Post Meridian!!!!
And an example of 18:40 vs 6:40 PM would be much better and obvious than 9:40! Just stupid.
Where are these settings stored ? I want to set them as default for new users on machines but I do not find anywhere which registry keys to set or which PowerShell command can do this.
Thank you. Most recent update reverted my settings and I forgot how to change it back to 24-hour.
Works as of 2022 March 08.
Thanks again!
Leave it to Microsoft to have this moronic, not obvious at all, way of switching to a 24-hour clock. Just have a button, right there, that says “24-hour clock”. For crying out loud.