Problem
By default Windows 10 will install the software (drivers) required to run a NVIDIA video card – it however doesn’t install the ‘NVIDIA Control Panel’ – which is completely optional and not required for everyday use.
Further more – it has terrible reviews on the Microsoft Store – currently 1.5 stars !
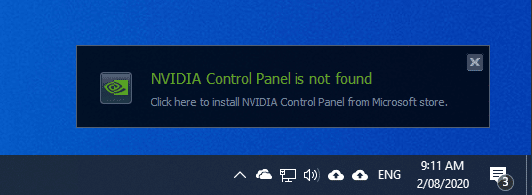
Despite this – Windows will display a prompt every time you turn on the computer which reads
NVIDIA Control Panel is not found

Click here to install NVIDIA Control Panel from Microsoft store.
Solution
These steps show how to disable the ‘NVIDIA Control Panel is not found’ prompt in Windows 10.
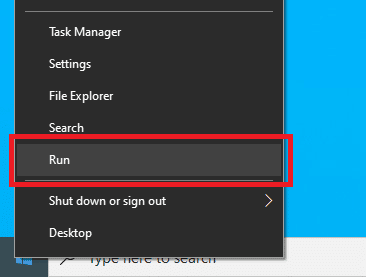
- Right-click on the Start menu and click ‘Run’ (or on the keyboard, press Windows + R)
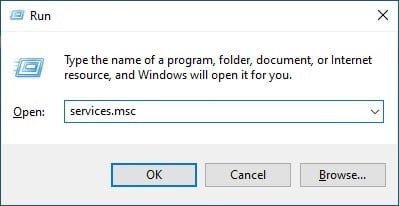
- In the ‘Open:’ box, type ‘services.msc’ and click ‘OK’
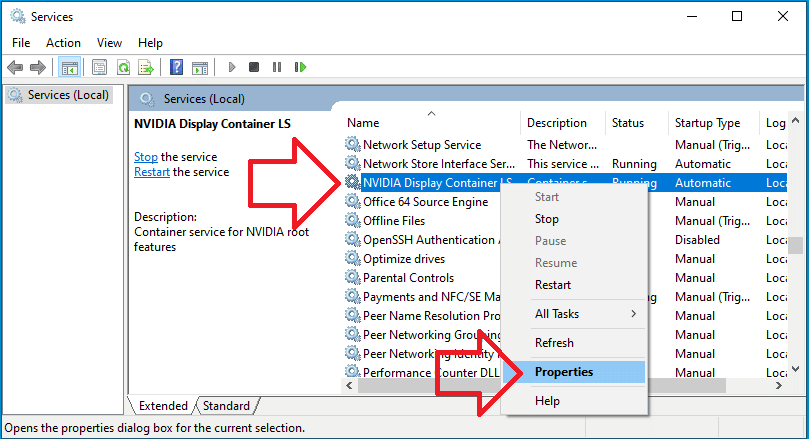
- Locate ‘NVIDIA Display Container LS’
- Right-click on it and choose ‘Properties’
- Change ‘Startup type’ to ‘Disabled’
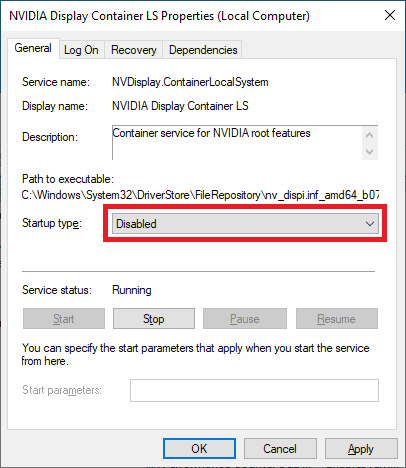
- Click ‘OK’ and close the Services window
- The prompt will no longer appear when you turn on the computer.
Does anyone know how to install NVIDIA Control Panel from the microsoft store but through powershell? Got 500 workstations where i work and i need to automate it. I’m looking to include this in a startup script that runs once after a machine get’s re-imaged.
This would still involve some work but the easiest way to deal with this stupid problem goes like this. Download the LAST version of the nvidia driver package from the nvidia website that is NOT “DCH”, which is a studio driver (this doesn’t really matter, but it’s the last date version before they broke down for MS and started putting components on the MS Store crap). The driver in question is “NVIDIA Studio Driver WHQL 472.84 December 13, 2021” Punching that in google might provide an immediate link, but if not, you must first search for “nvidia drivers download” on google, go to the download page, then select “Beta and Older Drivers”. On that page select “Prod type_ Geforce” then “Series_ Geforce RTX 30 Series” then select “Product_ ” Anything from the 3060 to the 3090. The 3090Ti has no non DCH driver and 3050 is the same. Select “OS_ Win 10 64bit” finally change “windows Driver Type” from DCH to Standard. Search and boom, the last top driver is the Studio driver. It shoudn’t matter what cards are installed on your work stations, nvidia drivers are generally ridiculously stable, and besides, we’re downloading this to install it solely to get a copy of the pre-DCH NVCPL directory. So if you already have drivers installed on your machine, look up “DDU Display Driver Uninstaller” you can read the extended literature if you want, but suffice to say, it rips the current driver out by the roots to make a clean environment for a fresh install. So look that up, always use due diligence so you know how to use it correctly, remove the current drivers with DDU then install the driver package you downloaded. I always suggest to use 7zip to extract the installer in to a directory on the desktop with the same package name since nvidia driver packages are basically just convenienceware for people who don’t understand computers. So after extracting it, run setup.exe (AS RIGHT CLICK>ADMIN). Ignore the stupid UAC warning, when it gets to the installer, select CUSTOM install (NO GFE EXPERIENCE CRAP) Install only the VGA driver, the audio driver and the PhysX driver. Reboot for good measure. Now the thing is, this part is specific to your system. So unless you already know where the installer would have plunked the nvcpl front end, search the drive (from root) for “NvStereoUtilityOGL.exe” make sure hidden and system files are enabled in search. I chose that particular nvcpl subcomponent specifically because of its very specific long name. Once found, go to its directory. It’ll probably be in the Windows folder in subdirectory below System32, but it’s been a long time since I figured this out; either way it’ll probably throw up another annoying UAC terror alert (I personally disabled UAC at the registry level; system is so much more responsive). There’s gonna be a number of files in this directory, but you only need four. “nvcplui.exe”, “nvcpluir.dll”, “NvGpuUtilization.exe” and “NvStereoUtilityOGL.exe” Make a new folder on the desktop called something like “OLDNVCPL” it doesn’t matter what the name is, as long as its contents are really obvious. Copy those four files to it. Dupe it, save it, zip it in a passworded archive, probably want to find some old thumb drives and make copies to those as well in case some stupid AV decides they’re nefarious and you need to white list them later, but it shouldn’t because they do carry legit SHA256 WHQL signatures; doesn’t matter. You do not want to lose those files. Now DDU to remove the old drivers, install the latest DCH drivers, and as is so often the case the DCH NVCPL will probably be broken. So plunk that folder anywhere – it doesn’t matter. Set the EXEs to run as admin by default (needs to be able to write to protected directories). Unlike others have said in this thread DO NOT disable “NVIDIA Display Container LS” but you’ll want to eliminate the execution arguments at start up for it (they’re like a mile long) because you still need the display container service. FINALLY with that folder on the desktop, simply go in, and double click nvcpl.exe. Instant gratification, NVCPL works again. Now you just have to figure out how to deploy that to five hundred clients (the old NVCPL will work on any client as long as NV Disp Container service is running, it’s just a front end.) But that’s beyond my working set of knowledge; I administrate five computers in my house, mostly by hand. Not a five hundred client business network. I hope this dissertation helps.
THANK YOU–seems small but that pop-up was so annoying to me every day.
Really appreciated
Thank you for this!
Disabling ‘NVIDIA Display Container LS’ in Services not only removes the ‘Prompt to Install Nvidia Control Panel’ it also removes the ability to manually start the Nvidia Control Panel by running nvCplUI.exe since the Service is Disabled.