There have been some changes for how you can customise the default user profile in Windows 7.
Microsoft have disabled the standard ‘Copy Profile’ tool and will only support profile copying when done with sysprep.
Table of contents
There are a few limitations for using sysprep to copy the profile:
- If you’re using an automated ‘build and capture’ task sequence with ConfigMgr (SCCM) you’re unable to log on and make the customisations to the profile before ConfigMgr captures the image
- Some changes will not be copied. Microsoft has not documented which settings and files get copied. For example, it will not save most taskbar or start menu customisations.
Microsoft’s solution to this is using Group Policy preferences, however they’re still quite limiting and doesn’t provide complete customisation to the profile. For example, you’re unable to enable the “My Computer” icon on the desktop or specify the default background colour for new users. Another good example of the incompleteness with this method is you can change the control panel to have the ‘icon view’ however you cannot select if you want large or small icons.
After some investigation and testing I’ve found that editing the profile through targeted registry changes is the only consistent way to change the default profile. This is also a method which Microsoft will support.
The following instructions will allow you to add profile customisation to your ConfigMgr OS Deployment Task Sequence.
Changes applied:
- Force Classic Control Panel – Small icons
- Show the desktop icons for Computer, User’s Files, and Internet Explorer
- Disable Microsoft Office first run message
- Disable Microsoft Communicator First Run Tour
- Set default theme (which applies the background colour)
Step 1: Create a custom Windows 7 Theme file
- Log on to a Windows 7 computer
- Right-click on the desktop and select ‘Personalization’
- Modify the profile as desired and then click on ‘Save theme’
- Save the theme file as ‘Win7Profile.theme’
- Navigate to C:\Users\%UserName%\AppData\Local\Microsoft\Windows\Themes
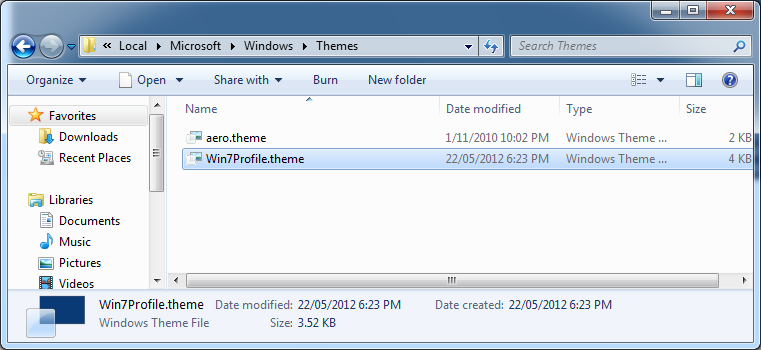
- Save the theme file to your temporary working folder, e.g. your desktop.
Step 2: Create the customisations script
REM ###################################################
REM ###################################################
REM ##
REM ## Apply customizations to Default User profile
REM ##
REM ###################################################
REM ###################################################

REM ##################
REM # Registry Edits #
REM ##################

REM **********************************
REM  Load Default User registry hive
REM **********************************
reg load HKU\DefaultUser "C:\Users\Default\ntuser.dat"

REM ******************************
REM  Force Classic Control Panel
REM ******************************
reg add "HKU\DefaultUser\Software\Microsoft\Windows\CurrentVersion\Explorer\ControlPanel" /v StartupPage /d 1 /t REG_DWORD /f
reg add "HKU\DefaultUser\Software\Microsoft\Windows\CurrentVersion\Explorer\ControlPanel" /v AllItemsIconView /d 1 /t REG_DWORD /f

REM *************************************************************************
REM Show the desktop icons for Computer, User's Files, and Internet Explorer
REM *************************************************************************
REM Show Computer icon on the desktop
REG ADD "HKU\DefaultUser\Software\Microsoft\Windows\CurrentVersion\Explorer\HideDesktopIcons\NewStartPanel" /v "{20D04FE0-3AEA-1069-A2D8-08002B30309D}" /t REG_DWORD /d 0 /f
REM Show User's Files icon on the desktop
REG ADD "HKU\DefaultUser\Software\Microsoft\Windows\CurrentVersion\Explorer\HideDesktopIcons\NewStartPanel" /v "{59031a47-3f72-44a7-89c5-5595fe6b30ee}" /t REG_DWORD /d 0 /f
REM Show Internet Explorer icon on the desktop
REG ADD "HKU\DefaultUser\Software\Microsoft\Windows\CurrentVersion\Explorer\HideDesktopIcons\NewStartPanel" /v "{871C5380-42A0-1069-A2EA-08002B30309D}" /t REG_DWORD /d 0 /f

REM *****************************************************
REM Disable Microsoft Office first run message
REM *****************************************************
reg add "HKU\DefaultUser\Software\Microsoft\Office\12.0\Common\General" /v ShownOptIn /d 1 /t REG_DWORD /f

REM *****************************************************
REM Disable Microsoft Communicator First Run Tour
REM *****************************************************
reg add "HKU\DefaultUser\Software\Microsoft\Communicator" /v TourPlayed /d "1" /t REG_DWORD /f

REM *****************************************************
REM Set default theme
REM *****************************************************
reg add "HKU\DefaultUser\Software\Policies\Microsoft\Windows\Personalization" /v Themefile /d "%systemroot%ResourcesThemesWin7Profile.theme" /t REG_SZ /f

REM ***********************************
REM  Unload Default User registry hive
REM ***********************************
reg unload HKU\DefaultUser
- In the temporary working folder, create a new text file called ‘Win7ProfileCustom.cmd’
- Add the following text
Step 3: Copy to your deployment share
To allow the ConfigMgr/SCCM task sequence to run the script you need to save it to a shared folder which can be accessed during the ‘build and capture’ process.
- Copy both of these files to your OS Deployment package on SCCM, for example in the MDT Toolkit package.
- Distribute the package to your distribution points.
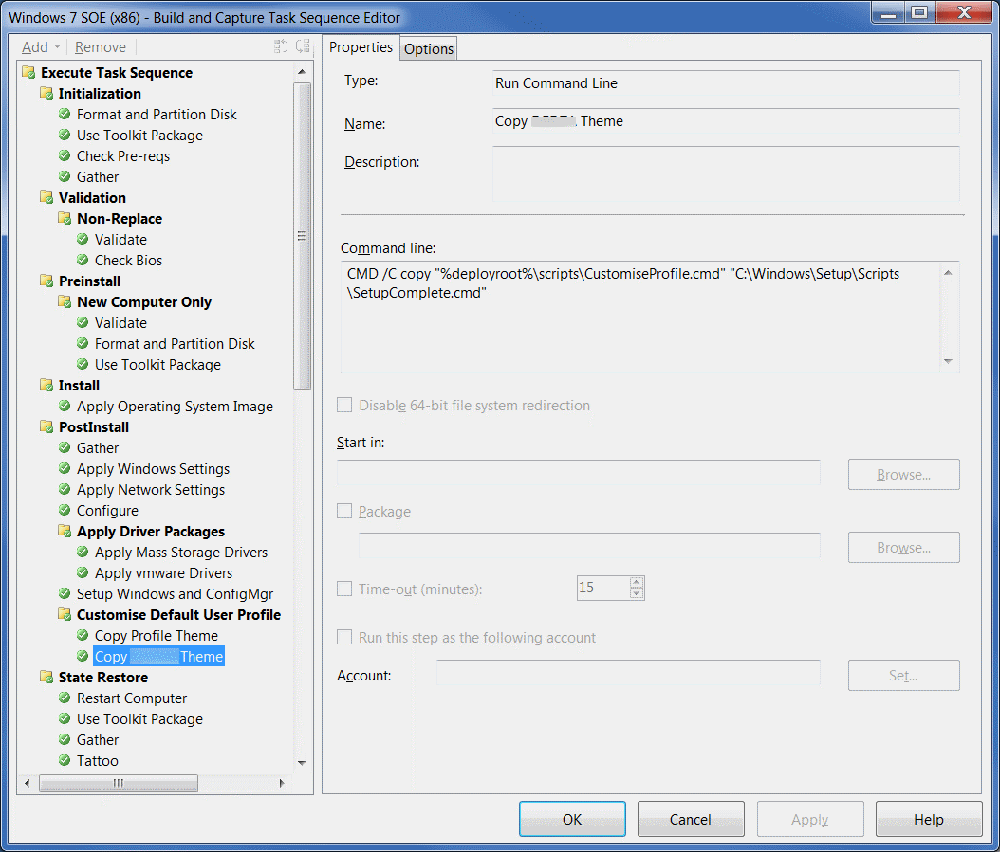
Step 4: Update your task sequence
Cmd /c copy "%osdeploymentshare%\Win7ProfileCustom.cmd" "C:\Windows\Setup\Scripts\SetupComplete.cmd"
Cmd /c copy "%osdeploymentshare%\Win7Profile.theme" "C:\Windows\Resources\Themes"
- Edit your ‘build and capture’ task sequence
- Add two new script elements, these need to be after Windows 7 and applications are installed.
- Note: if %deploymentshare% is not a valid variable in your environment you may need to specify the full share path
Step 5: Test it out
- Save the changes and run a new ‘build and capture’ to test.
Help! It’s not working!
Here are some tips to get you on your way:
- Is the script running? Try applying the customisations to a standalone Windows 7 PC. You will need to save the theme file into the C:WindowsResourcesThemes folder then run the customisations script. Log on as a new user (or a user which hasnt logged into the computer yet) and verify if the profile customisations have applied. If it has – your issue isn’t with the script, it’s at the ‘build and capture’ stage.
- Can you access the deployment share during the build and capture process? Enable the F8 support (if you haven’t already), during the build and capture process, roughly when the script is meant to run press F8 – the Windows command prompt should appear. Manually type out the two commands – is there an error message? What does it say?
- Access denied? the account does not have access to the deployment share
- File not found? did you type the command correctly? Is the command correct at all? Try running it on a standard Windows 7 system – does it work there?
| Having troubles with the instructions? Take a look at our example download:To use- extract the ZIP file and run ‘install.cmd’ as Administrator.Log on a new user (a user which hasnt logged into the computer before, and/or doesn’t have a profile already!)
Full Download: www.itsupportguides.com/downloads/Windows7CustomiseProfile.zip |
having trouble getting this to work.
I have created a run Command line named Copy Custom profile and in the command line I have cmd.exe /c copy “\ServernamesetupSCCMScriptsWin7ProfileCustom.cmd” “C:WindowsSetupScriptsSetupComplete.cmd”
After the image finishe the profile is not how it supposed to be and when I check setupcomplete.cmd the .cmd is not copied here.
Any ideas?
I have the Copy Custom profile at the very last step before the “Restart Computer”
Hello. Great article. Is it possible to also configure what items will be pinned to the task bar?
Hey, no problem at all. Hopefully this all comes to some help for you – I know it did for me!
From memory the SetupComplete.cmd script runs right before the logon screen appears.
There’s also a log somewhere which shows if it was run and what it did – however my memory isnt that great!
Here’s the Microsoft page about it all: http://technet.microsoft.com/en-us/library/cc766314%28v=ws.10%29.aspx
Hi d4rkcell.
I had inconistent results when running the DOS commands straight from the task sequence.
I highly recommend you contain all the DOS customistation commands in a CMD file called [b]’SetupComplete.cmd'[/b] and have it saved to [b]C:WindowsSetupScriptsSetupComplete.cmd[/b] during the task sequence process.
If you’re not already aware, [b]SetupComplete.cmd [/b]is automatically detected and ran by Windows 7 the first time Windows 7 loads.
Hopefully this makes sense!
[img]www.mockbox.net/images/stories/SCCM-TaskSetupComplete1.png[/img]
Hi can I take snippets from the above script for example.
reg add “HKUDefaultUserSoftwarePoliciesMicrosoftWindowsPersonalization” /v Themefile /d “%systemroot%ResourcesThemesWin7Profile.theme’” /t REG_SZ /f
and insert this into my task sequence as a run command line item? If I insert a run command line item above this one that loads the default user hive and then stick a third run command line item after the main one that unloads the hive…. any advice?