This guide will show you how to publish your WordPress plugin to the plugin directory using TortoiseSVN on a Windows 8 computer. If you have already published the plugin and instead need to update it, see How to update an existing WordPress plugin SVN repository.
Table of contents
The guide assumes you have already developed your WordPress plugin, submitted a request to the directory and received the approval email.
You will need:
- The approval email – detailing the SVN address for the plugin
- A copy of the plugin
- A copy of the readme.txt
- TortoiseSVN installed (make sure you select the right version for your operating system – 32-bit or 64-bit)
How to publish a new WordPress plugin
- First, start with the approval email – you will find the address to the SVN repository. It’ll look something like
-
https://plugins.svn.wordpress.
org/my-name-of-plugin - Now find a suitable location on your computer to store your copy of your plugin. I suggest you create a folder so it doesn’t get confused with your other files and folders. For example, in your Documents folder create a folder called wp-plugins
- Now under wp-plugins create another folder with the name of your plugin, taken from the above address. For example
-
documents\wp-plugins\my-name-of-plugin
- Right-click on the new folder and choose ‘SVN Checkout’
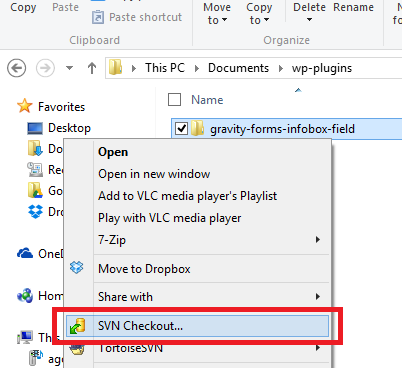
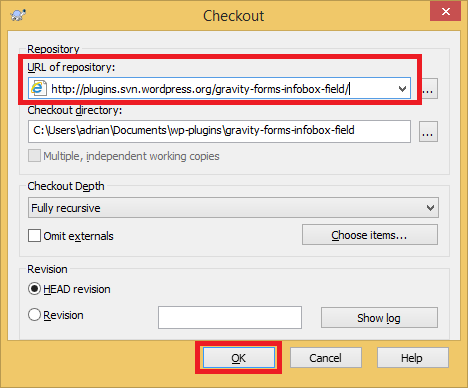
- A new window will open, under ‘URL of repository’ enter the full URL as provided in the approval email then click ‘OK’
- The directories from the SVN repository will now download to your computer. As it’s a new plugin the folders will be empty.
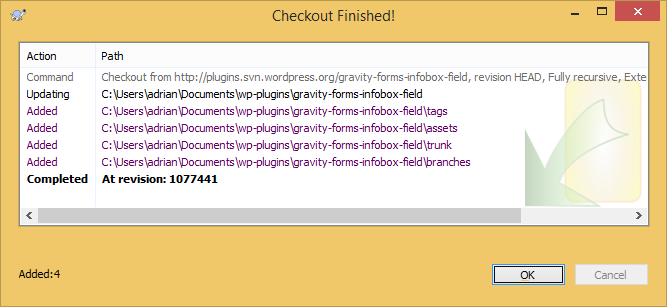
- Click ‘OK’ to close the window
- The two folders you need to know are:
- Trunk – this is where the latest version of your plugin lives. You can maintain the files from here and commit the changes when they’re ready.
- Tags – this is where the revisions of your plugin lives. You will should never need to modify the files in this folder, these are your backups for each version of the plugin.
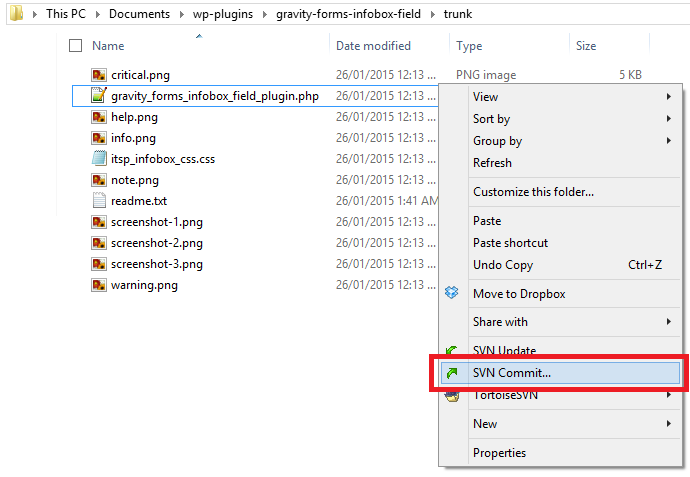
- Open the Trunk folder and copy ALL your plugin files and folders (php, css, js etc) as well as your readme.txt (note, your screen-shot images can go to the ‘assets’ folder)
- Now right-click in a blank area and choose ‘SVN Commit’
- In the top text box enter a message to note the update, for example ‘Version 1.0 – First public release’
- In the bottom box check all the files (If you see a thumbs.db – do not tick it, this is a Windows system file, nothing to do with your plugin)
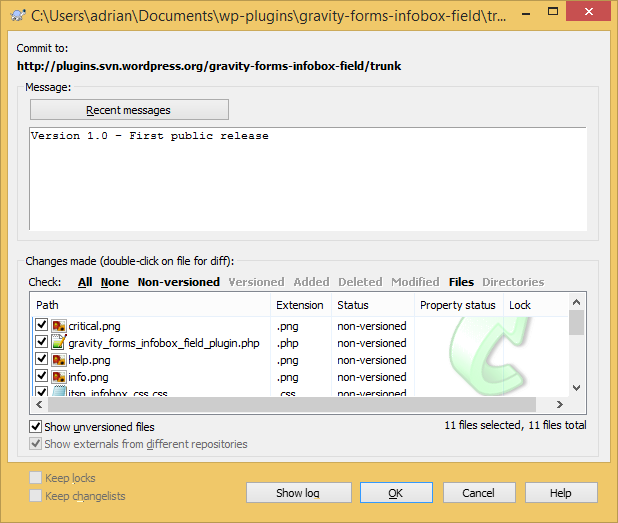
- Click ‘OK’
- You will now be prompted for your username and password – this is the same username and password for the WordPress forum and website
- Enter the username and password and click ‘OK’
- The files will now upload from your computer to the repository. You will see the update log on the screen and a bold ‘Completed’ message once it’s done. You will also receive an email from WordPress confirming the plugin has been uploaded.
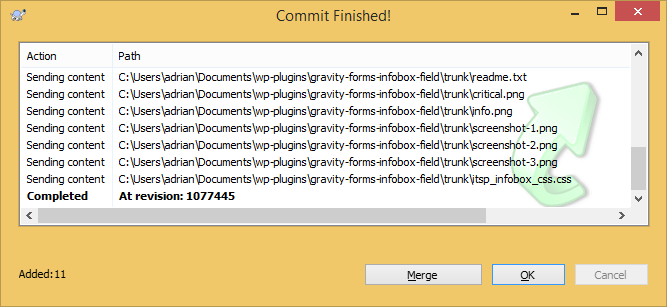
- Click ‘OK’ to close the window.
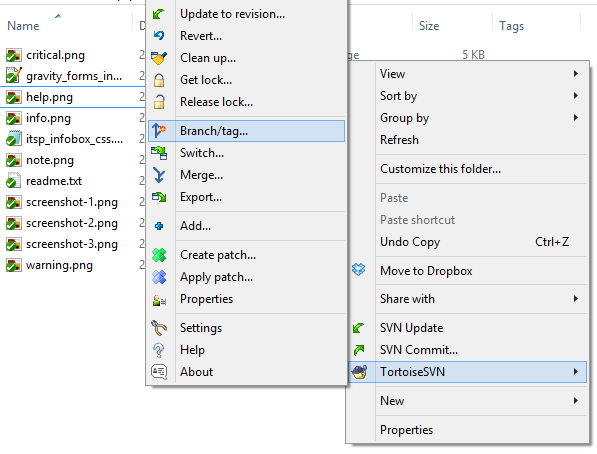
- The plugin is now publicly available from the WordPress directory – however there is one other step that is highly recommended – adding a revision to the tags directory.
Step 2: Add revision to tags directory
- From the trunk folder, right-click in a blank location and choose TortoiseSVN – > Branch/tag
- In the ‘To path’ folder, change the location from /trunk to /tags/<version number>
- For example
-
/my-name-of-plugin/tags/1.0
- Enter a revision comment, e.g. version 1.0 – first public release
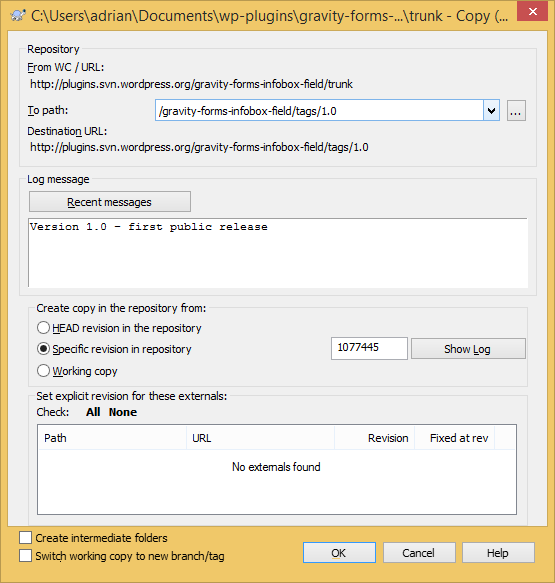
- Click ‘OK’
- You will now be prompted for your WordPress username and password again – this is the same username and password for the WordPress forum and website
- Once done you will see a message like this
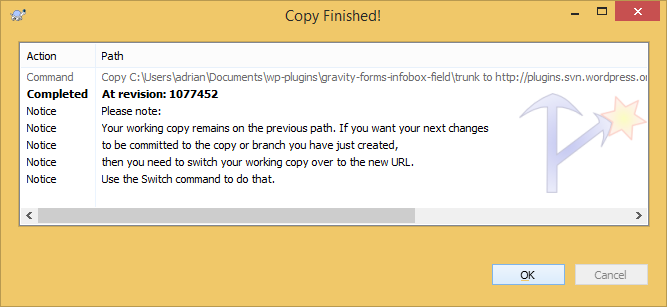
- Click ‘OK’ to close the window
- You can now go into the tags folder, right-click and choose ‘SVN Update’ – this will download all the revisions (or the one you just uploaded) to your computer.
Thank you, very helpful post!
Great Article!
Wish I could give you a thumbs up or some kind of rating!
You really helped me upload my first WordPress Plugin (Coding blocks).
Thank You so much
I am also working on a rating widget for posts like this that deserve some good upvotes!
Great article. thank you.
Great article. Thanks!
This article is a true life saver 🙂 Thank you for sharing.