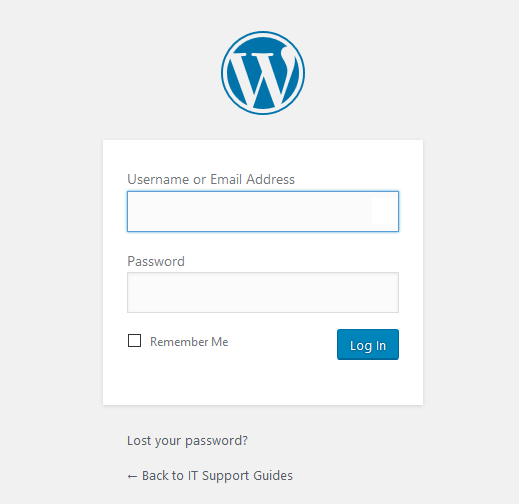
wp-login, also known as “The Login Form” is the standard place where authentication is handled on WordPress websites. It’s the screen users see and interact with when registering, logging in and resetting passwords.
Customising this page remains uncommon despite providing a consistent user for your front-end users.
The guide below will step through how to customise wp-login by:
- Adding HTML structure into the page
- Applying style sheets to the page
- Customising the logo
- Customising the field labels and text in the login form
- Customising the notifications and prompts
- Customising the password reset email
- Disable random password at new password screen
If you haven’t already, I highly recommend you read the official instructions on how to customise wp-login on the WordPress codex: Customizing the Login Form
I also highly recommend any customisations are placed into a custom plugin (NOT your theme’s functions.php file) – this way you can easily enable/disable the customisations and keep them when you update or replace your theme. See How to create a WordPress plugin for your custom functions for how to do this.
In the examples below we’ll be going from
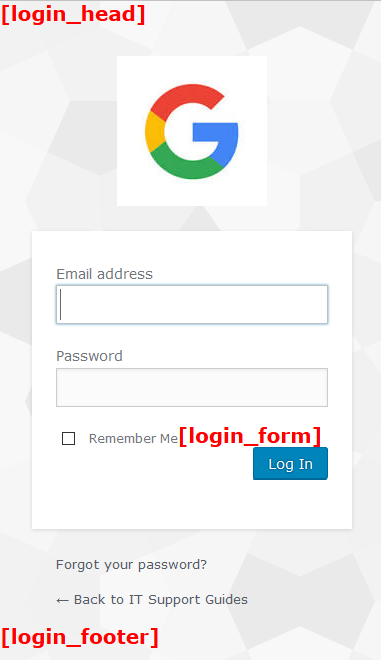
TO
FULL DOWNLOAD
A full copy of these filters can be downloaded as a custom plugin here:
https://www.itsupportguides.com/downloads/itsg-custom-wplogin.zip
Adding HTML structure into the page
Customising the HTML structure in wp-login is done using several filters:
These are placed above, inside and below the login form as shown below:
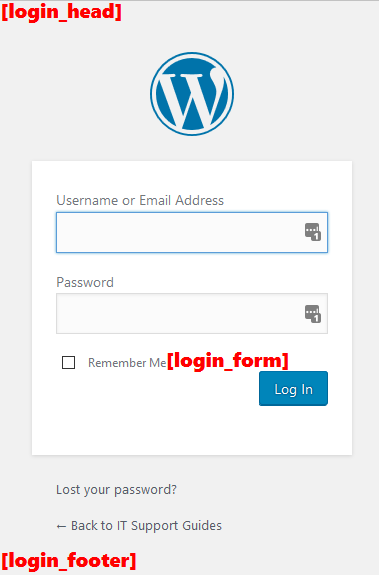
If you are trying to produce the same design used in your front end theme the trick here is to work out where the login form needs to sit in the page compared to the layout (for example, in the top of the page or the content area) and recreating the HTML above and below using login_head and login_footer (the login_form action is less useful for this purpose).
The example below shows how to use these filters to add the HTML content into the form.
add_action( 'login_head', 'my_custom_login_head' );
function my_custom_login_head() {
     $html = '<span style="font-weight:800;font-size:20px;color:red;">[login_head]</span>';
     echo $html;
}

add_action( 'login_form', 'my_custom_login_form' );
function my_custom_login_form() {
     $html = '<span style="font-weight:800;font-size:20px;color:red;">[login_form]</span>';
     echo $html;
}

add_action( 'login_footer', 'my_custom_login_footer' );
function my_custom_login_footer() {
     $html = '<span style="font-weight:800;font-size:20px;color:red;">[login_footer]</span>';
     echo $html;
}
Applying style sheets to the page
Now that you have some HTML content added to the form you’ll want to add a style sheet (e.g. CSS) to to the page too format the HTML content.
This is done using the login_enqueue_scripts action.
For example, this would add the current active front end theme’s style.css to the wp-login page.
add_action( 'login_enqueue_scripts', 'my_custom_login_enqueue_scripts' );
function my_custom_login_enqueue_scripts() {
    wp_enqueue_style( 'my-custom-login', get_stylesheet_directory_uri() . '/style.css' );
}
Customising the logo
At the top of the login form you see the WordPress logo, which by default is a link to the WordPress website.
<a href="https://wordpress.org/" title="Powered by WordPress" tabindex="-1">IT Support Guides</a>
There are three components to this:
- the image (the WordPress logo)
- the link (wordpress.org)
- the title (Powered by WordPress)
Changing the image
The image can be changed to an image of you choice using CSS. It’s recommended that you do this in a style sheet, however as an example I will show how to do this using the login_enqueue_scripts filter and inline styles.
In this example we change the logo to the Google logo. Note that this CSS uses the base64 code for the logo – however you could also link to a file.
add_action( 'login_enqueue_scripts', 'my_custom_login_enqueue_scripts_inline' );
function my_custom_login_enqueue_scripts_inline() { ?>
    <style>
        #login h1 a {
            background: url(data:image/jpeg;base64,/9j/4AAQSkZJRgABAQAAAQABAAD/2wCEAAkGBwgHBgkIBwgKCgkLDRYPDQwMDRsUFRAWIB0iIiAdHx8kKDQsJCYxJx8fLT0tMTU3Ojo6Iys/RD84QzQ5OjcBCgoKDQwNGg8PGjclHyU3Nzc3Nzc3Nzc3Nzc3Nzc3Nzc3Nzc3Nzc3Nzc3Nzc3Nzc3Nzc3Nzc3Nzc3Nzc3Nzc3N//AABEIAJcAlwMBEQACEQEDEQH/xAAbAAEAAgMBAQAAAAAAAAAAAAAABAYBBQcDAv/EAD8QAAIBAwEFAwgGCAcAAAAAAAABAgMEBREGITFBURJSYSJxgZGTscHRBxMUFnOhFyQyM0JTcqIVNENUVWLh/8QAGwEBAAIDAQEAAAAAAAAAAAAAAAMFAgQGAQf/xAA1EQEAAgECAwUGBAUFAAAAAAAAAQIDBBESITEFQVFhkRQVInGBoQYTMrEzQlLR4TRDY8Hx/9oADAMBAAIRAxEAPwDuIAAAAAAAAAAAAAAAAAAAAAAAAAAAAAAAAAAAAAAAAAAAAAAAAAAAAAAAAAAAAAAAAAAAAAAAABjVdQNVk9osTjX2bq9pqov9OHlS9SIrZqV6y28Gh1GeN6V5NBcfSHYwbVvZ3FXztRIZ1lY6QsadhZZ/VaIRf0jr/ipe3/8ADD2zyS+4P+T7f5S7b6QsfOS+0WtxRXVaSRlXWV74RZOws0RvW0T9lhxmfxWT8mzvaU586bfZl6mbFctL9JVubRZ8HO9Z2bLVdSRqsgAAAAAAAAAAABBy2UtMTbO4vKnYhwS5yfRLmYXvFI3lPp9Pk1F+DHG7mme2wyGTk6VtKVpa9yD8qS8ZfIrsuotflHKHU6TsrDg53+K329Fb56vj1NdaMgYAyATaaaejXBrkCecbLRs9tpe46UKN+53dtw1b8uHmfP0m1i1Nq8rc4VGs7IxZvix/Db7S6Vj7+2yVtC5s6salKS3NcvB9GWFbRaN4ctlw3w3ml42mEoyRgAAAAAAAACDmMnQxNjUu7p+RHhFcZPkkYXvWkbyn0+nvqMkY6dZcfzOVuczeSubuW/hCC4QXRFTkyTktxS7XS6XHpsfBT6+aAYNgA9KFGrcT7NCnOrLu04uT/I9iJnoxvetI3tOyZ/gmW01/w260/CZl+VfwQe2af+uPVCq0qlGXYrU505d2cey/UzCYmOqet62jes7vgMk7D4q5zF7G1tI7+NSb/ZhHq/kZ48dsk7Q1tVqsemx8d3XcFiLXDWStrWPjOb4zl1Za48cY67Q4zVam+pycd/pHg2RI1wAAAAAAADD4Acq29ylW+y7tdJRt7bdDX+N85fAqc2eM1vhnlH7uu7I01cWHj/msrJCtiK7TSSbbei0W8HzXzZvYZThG6zSer3xtk+H9T+Bu4tLvHFdzut7ZmJ4NP6/2Xm0taFpSVK2o06UFwjCKSN6KxEbRCgvkvkne87y9z1gjXtlbXtJ0rq3p1oPipxTMbVraNphnjy5Mc8VJ2lR81sDN3MZ4ioo0ZySnTqvX6tdU+a8DSyaTnvRf6XtuIrMZ45+Xf81uweHtsNZxtraHjOo1vnLqzbx44xxtCl1WqyanJx39PBsyRrgAAAAAAAACJk7j7PY1qi/aS0j5zS7Q1Hs+mvkjrsmwY/zMkVUW9s6N7T7FwtUt6kuKfgcFg1OTBbirLosWS2Od6yqmRxtawku2u1SfCouB0mm1dNRHw9fBa4c9cscuUrZ9HeCjWk8tcwTUJONvF9ecvgi20uKJ+OVN2zrZrH5FPr/Z0NLQsHNsgYAAAAAABkAAAAAAADSbTT0tqUO9P3HPfiHJMaetPGW/2fX45lXTjls+Z041YunKKlGe5xa3Mkpa0Wjg6m/DPEuuOtKdjZ0LajHs06UFFI+lYqzWkRLns2S2XJN7dZSiRGAVTbLP32Gr2sLJUtKsZOX1kdeDRZ9n6THqK2m/c0tVnvimIr3q99+cx3bb2b+ZYe6tP5+rW9ty+R9+cx3bb2b+Y91afz9T23L5H35zHdtvZv5j3Vp/P1PbcvkffnMd229m/mPdWn8/U9ty+TD25zOm5W2vT6t/M991afz9XntuXydDxty7vH21w9NatKM3p1aOfy04Mlqx3StaW4qxKURsgAAAAAK/tRwtumsvgcv+JOmP6/8ASy7O/maI5VZvuhp9op69+PvJ9N/Gp84/eGGT9E/KV6PpbnQABz/6S/8AN2H4c/ei+7H/AE3Vmv61UwuGgAAAD5DvHXtmHrgMf+BH3HJaz/UX+crzB/Cr8m1NZMAAAAABpdpqbla0592fvOe/EOObaet/Cf3b2gtteYVtM49bvivXp29N1as1CK5slw4smS8VxxzQ5s+PDSb5Z2hdcVe08hYULqi9Y1I6+bwPpOOZmkTLnq5K5I469JTDNkAVHbTB3+XuLWdlCElShJS7U1He2i07P1eLBFovPVparBfJMTVW/uXm/wCTR9siy96abxn0ansebwPuXm/5NH2yHvTTeM+h7Hm8EPKbP5HFW6r3sKcYOXZXZqJvUlwazFntw0YZNPfHG9mqNtAN6JvwHeS7LhaLoYiypNaONCCa8dEcfqLcWa0+cr7FG1IhOIUgAAAAAEbI2/2myq0ubju85qa7T+0ae+Pxj7pcN+DJFlBvr2lZQ1qaupyprizhtLoMuonaOUR1lYa3tHFpK725z3QrN5eVbyp26r0S4RXBHVabS49PXhp/64vV6zLqr8WSfp3Qs+wedjZ1njruXZo1Za0pPhGXT0+838N9p2lPodRFJ/Lt0dFT1NtcMgY0AaAYYHNtvMvG+v4WdvLWjba9p8nPn6kdF2Zppx047dZ/ZU6zLF78Mdyrlo00vFWbv8lbWq10q1En4LiyHUZIxY5vPczx147xV2dJJJLgcf1X+2zIAAAAAAMPgBzLbvDzsck72mm7e5euvdnzXxNLLjik7wpdfimuT8zulWCJoAFv2c20qWcIW2UUqtGK0jWW+UfP1J8eaY5WWOn13BHDk6eK82GUsb6mp2l3Sqp8lLevOjZi0T0WlMtLxvWUzXdqZJES+yVlY03O7uqNJLvS3+oxm0R1lHfLSkb2nZStottHcQlbYjtQg90q8lo2v+q5edk2i1GmjNH53Tu8Pqrs2vi3w09VNOxiYmN46NIPRdvo7xTbqZWrHdvp0df7n8PWUna2o6Yo+crDQ4v9yV9XApFkAAAAAAAARcjZUMhaTtbmHapzW/qvFeJ5MRMbSwyY65KzWzk2dw1zhLr6munOnL93WS3TXz8DRvSaS5/PgthttLXGCFgDK8l6x1T6p6MD1+1XGmjua+nT62XzPd58WXFbxeL1b1bbl1b1PGIBlMtNB2nk008NudfDw+TKttm22ewtfNXip00428WnWq6bkui8WdHk7RwxhjLSd9+n+W3gxTmnl0dYtLela29OhQgoU4LSMVyRzl72vabW6yu4rFY2h7GL0AAAAAAAAARr6xtshbzt7ukqlKXFPl5jyYiY2lhelb14bQ57nNi7uzlKrjf1m37n8cfRzNW+GY6KjPob0505wq004TcJxcZR3OMlo0QtCd4nZg8AABmKcpqEU3KW5RS1bBHOdoWfB7G3t7ONXIJ2tvx7L/eS9HL0k9MMzzlvYNDe/O/KHQ7Cyt7C2jb2lNU6UVuS5+L6s2a1ivKFxSlaV4awlGTMAAAAAAAAAAADQCHf4yyyC0vLWlVemmso716TGaVnrCO+Kl/1Q0VxsLiKrbpu5o/hz1X5pkc4KtS3Z+Kem8I36PbH/fXf9nyMfZ48WHuyn9U/ZJt9hcRSadR3Nb+upovySMowVSV7PxR13lu7DFWOPX6pa0qT7yjv9fEkilY6Q2qYqU/TCboZJGQAAAAAAAAAAAAAAAAAAAAAAAAAAAAAAAAAAAAAAAAAAAAAAAAAAAAAAAAAAAAAAAAAAAAAAAAD/9k=) no-repeat;
            height: 150px;
            width: 150px;
        }
    </style>
<?php }
Changing the logo link
The link is changed using the login_headerurl filter, for example:
add_filter( 'login_headerurl', 'my_custom_login_headerurl' );
function my_custom_login_headerurl() {
    return home_url();
}
Changing the link title
The link is changed using the login_headertitle filter, for example:
add_filter( 'login_headertitle', 'my_custom_login_headertitle' );
function my_custom_login_headertitle() {
    return 'IT Support Guides';
}
Customising the field labels and text in the login form
All the text, including the field labels, can be customised using the gettext filter.
For example, to change “Lost your password?” to “Forgot your password?” and “Username or Email Address” to “Email address” you would use the following:
NOTE: because gettex applies to all of WordPress we’re also checking that we’re only changing the text on the wp-login page. If you want to apply the same change(s) to all parts of your website you would remove this check.
add_filter( 'gettext', 'my_custom_gettext', 20, 3 );
function my_custom_gettext( $translated_text, $text, $domain ) {
    if ( 'wp-login.php' === $GLOBALS['pagenow'] ) {
        if ( "Lost your password?" == $translated_text )
            $translated_text = __( 'Forgot your password?' );
        elseif ( "Username or Email Address" == $translated_text )
        $translated_text = __( 'Email address');
    }
    return $translated_text;
}
Customising the notifications and prompts
There are several notifications and prompts displayed from the wp-login page when registering, logging in and resetting passwords – these are also customised using the gettext filter.
To customise the text you need to first get the text to then use it in gettext for example the following filter will customise:
“Check your email for the confirmation link.” and “Please enter your username or email address. You will receive a link to create a new password via email.”
add_filter( 'gettext', 'my_custom_gettext_prompts', 20, 3 );
function my_custom_gettext_prompts( $translated_text, $text, $domain ) {
    if ( 'wp-login.php' === $GLOBALS['pagenow'] ) {
        if ( "Check your email for the confirmation link." == $translated_text )
            $translated_text = __( 'An email has been sent to the given email address. Please check your email and follow the instructions to reset your password.' );
        else if ( "Please enter your username or email address. You will receive a link to create a new password via email." == $translated_text )
            $translated_text = __( 'Please enter the email address registered with this website. You will receive an email with instructions on changing your password.' );
    }
    return $translated_text;
}
Customising the password reset email
There are two components to the password reset email – the title and the body of the email.
NOTE: The sender email address and display name are set globally for WordPress (or your web host).
Customising the email title (subject line)
The title of the password reset email can be customised using the retrieve_password_message filter.
By default it would look something like
[Site Title] Password Reset
The example below shows how to change it to “Password reset for account name“:
add_filter( 'retrieve_password_title', 'my_custom_retrieve_password_title', 10, 3 );
function my_custom_retrieve_password_title( $title, $user_login, $user_data ) {
    return sprintf( __( "Password reset for %s" ), $user_login );
}
Customising the email body
The body of the password reset email can be customised using the retrieve_password_message filter.
This filter allows you to completely recreate the email body text. For example:
add_filter( 'retrieve_password_message', 'my_custom_retrieve_password_message', 10, 4 );
function my_custom_retrieve_password_message( $message, $key, $user_login, $user_data ) {
    $message = __( 'A password reset has been requested for an account with the following username:' ) . "\r\n\r\n";
    $message .= $user_login . "\r\n\r\n";
    $message .= __( 'Please click on the link below to reset your password. If you are unable to click the link, copy it to your browser and press enter to reset your password.' ) . "\r\n\r\n";
    $message .= network_site_url( "wp-login.php?action=rp&key=$key&login=" . rawurlencode( $user_login ), 'login' ) . "\r\n\r\n";
    $message .= __( 'If you did not request a password reset or it is no longer required, please ignore this email.' ) . "\r\n\r\n";

    return $message;
}
This would send an email like
A password reset has been requested for an account with the following username:

username

 Please click on the link below to reset your password. If you are unable to click the link, copy it to your browser and press enter to reset your password.

 link

 If you did not request a password reset or it is no longer required, please ignore this email.
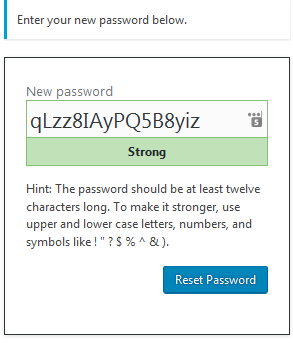
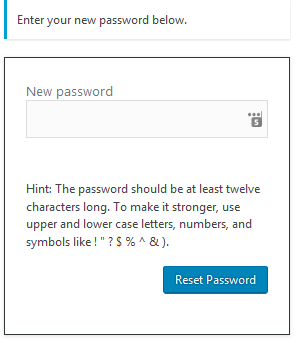
Disable random password at new password screen
When resetting passwords in WordPress a random password is automatically generated and pre-filled in the password field.
The random password may be seen as overwhelmingly complicated for some users and most would prefer to choose their own password.
The following filter shows how to disable this feature by setting this automatically generated and pre-filled password to blank – forcing the user to choose their own password.
NOTE: This only applies to the email – reset – change password process – not the back end reset password.
With the filter enables the ‘new password’ field will look like this when the reset password page loads.
// disable random password
add_filter( 'random_password', 'disable_random_password', 10, 2 );

function disable_random_password( $password ) {
    $action = isset( $_GET['action'] ) ? $_GET['action'] : '';
    if ( 'wp-login.php' === $GLOBALS['pagenow'] && ( 'rp' == $action  || 'resetpass' == $action ) ) {
        return '';
    }
    return $password;
}
Bonus customisation
Know other customisations?
Comment below if you know of other great ways to customise the wp-login page to improve the user experience.
FULL DOWNLOAD
A full copy of these filters can be downloaded as a custom plugin here:
https://www.itsupportguides.com/downloads/itsg-custom-wplogin.zip