The following steps show how to enable hard drive encryption using BitLocker on Windows 10.
With BitLocker enabled the data on your hard drive will not be able to be accessed without either a valid login or the recovery key.
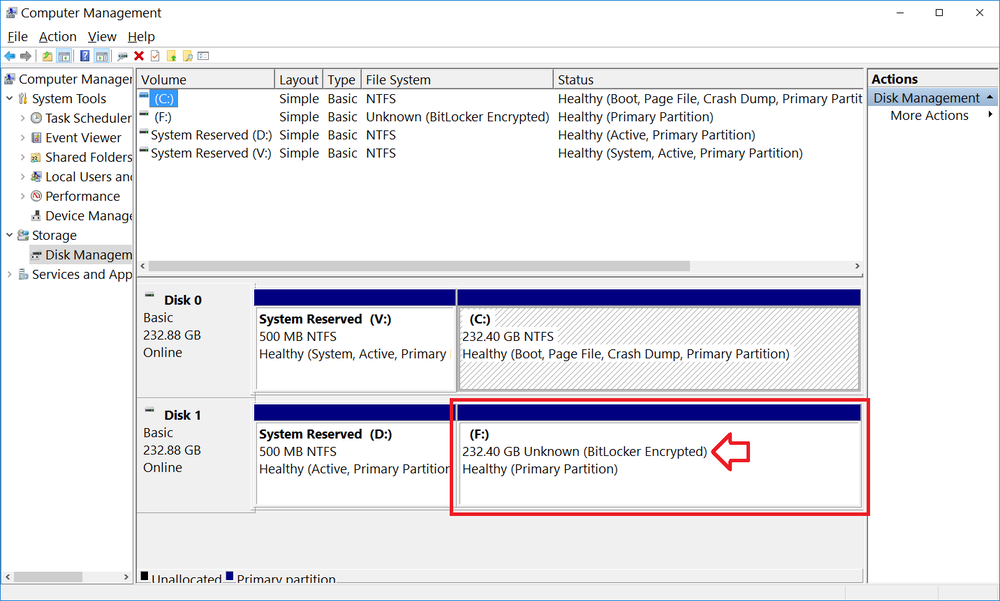
If someone plugs the drive into another Windows computer they will see that it is encrypted using BitLocker.

Note:
- BitLock is NOT available in Home edition. It is only available in Pro, Enterprise and Education editions.
- Your computer requires a TPM 1.2 or higher to use BitLocker — if you’re not sure what this means, you’ll find out if your computer does not have this when you get to step 5.
- Having Windows 10 protected by a username and strong password is as important — if the computer logs in automatically or doesn’t use a strong password there is little to stop someone from booting Windows and accessing the data on the drive.
- Having drive encryption can make repairing the computer, in the event that something goes wrong, harder. You won’t be able to use third party bootable repair tools, as they wont be able to access the data on the drive. In the event that the computer stops booting you will need to decrypt the drive then repair the Windows installation.
How to enable BitLocker
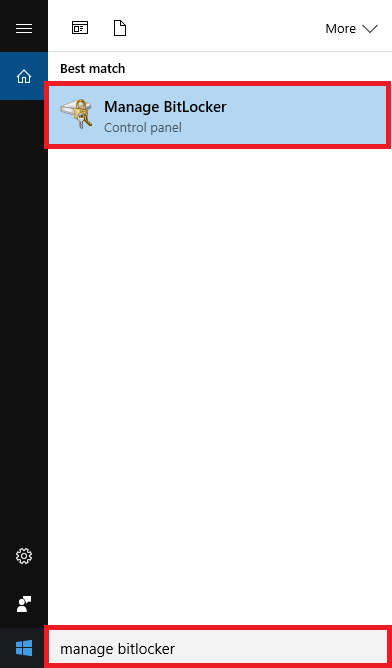
- In the Windows search box, type “Manage BitLocker” and click on it when it appears in the list above
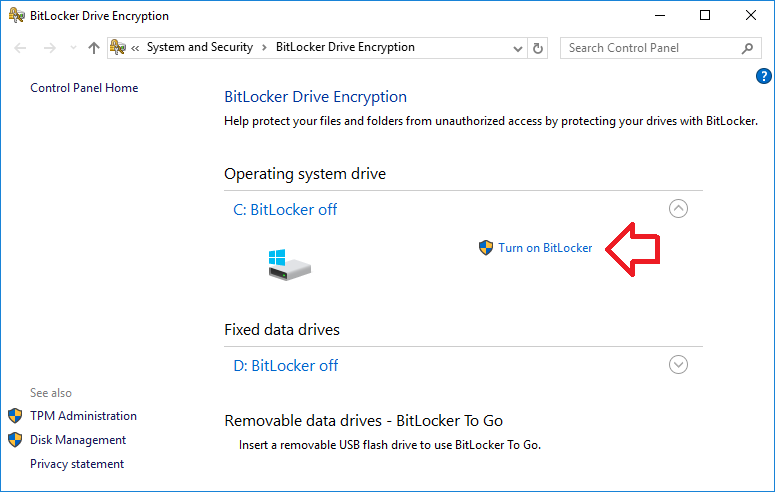
- Click on the ‘Turn on BitLocker’ link next to the drive you want to encrypt. Normally this would be the C: drive.
- A compatibility check will run — if your computer does not have a TMP 1.2 or greater device it will fail at this step.
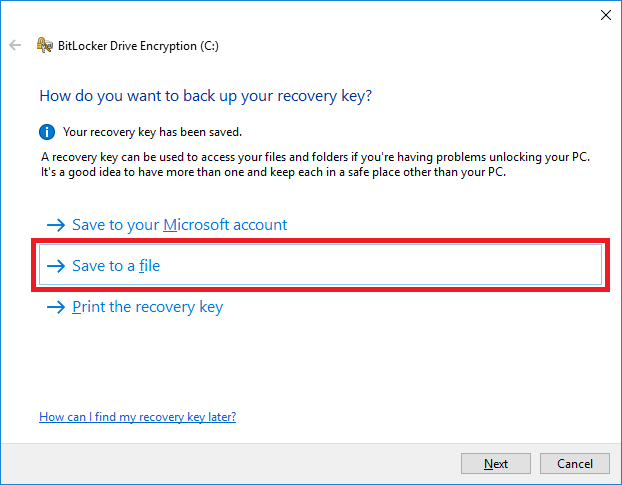
- The first step is a very important question – where to store the recovery key, which is required if things go wrong and you need to repair the computer. I prefer to choose ‘Save to a file’ and to save to two USB drives in a safe location — I use this option because it allows me to control the security by using physical security. Choose the option that works best for you and click ‘Next’
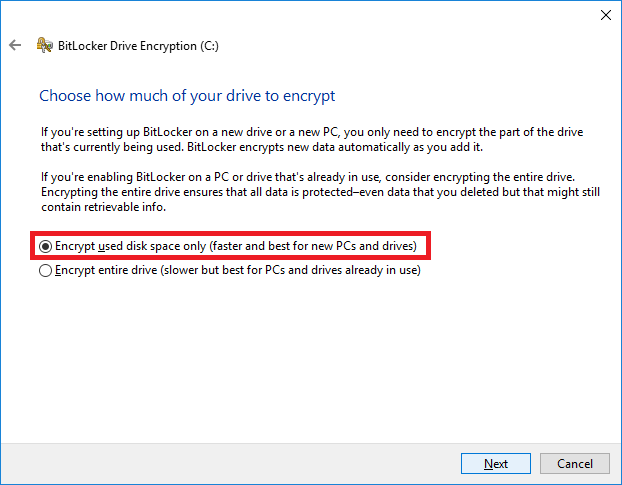
- If you’re encypting a fresh install choose ‘Encrypt used disk space only’ otherwise choose ‘Encrypt entire drive’ and then click ‘Next’
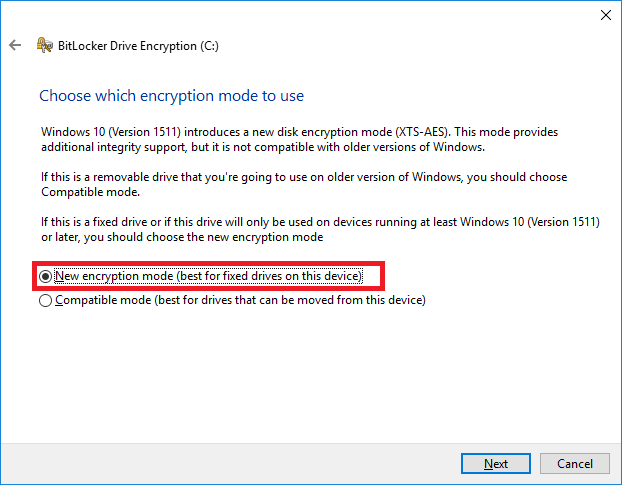
- Leave ‘New encryption mode’ selected and click ‘Next’
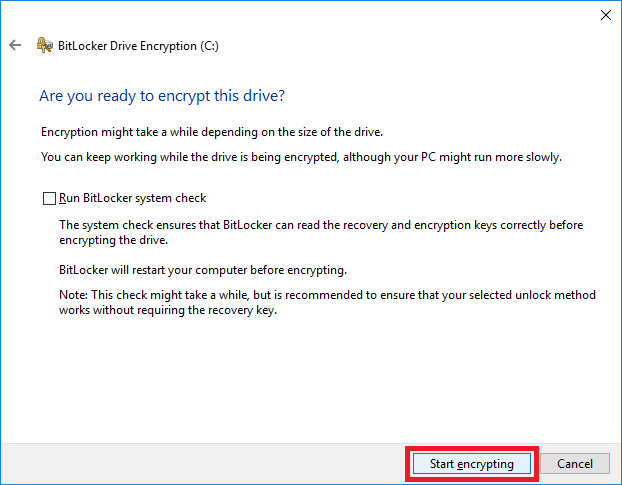
- Finally, to start the process click ‘Start encryption’
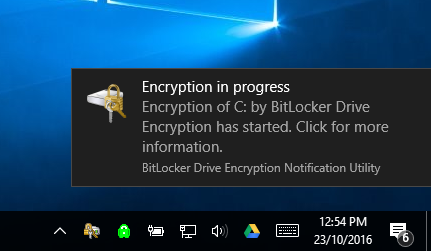
- A message will appear in the bottom right of the screen to show the encryption process has started.
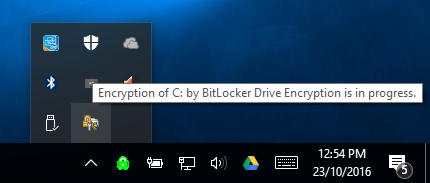
- After the message goes you can find it again in the taskbar
- Encryption will take at least 10 minutes – the exact time depends on how much data needs to be encrypted
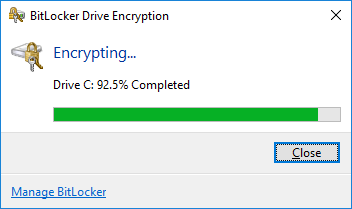
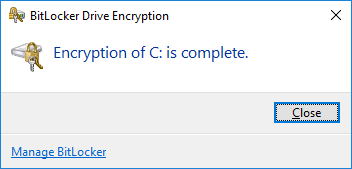
- Once done you will will see a confirmation window.