Modern internet browsers have the ability to use a custom style sheet to override the styles on all websites.
This feature can be used to make websites more accessible for people with vision impairments that require specific background-font contrasts.
With Internet Explorer you need to create a separate CSS file, for example MyStyle.css and configure Internet Explorer to use it.
The steps below detail how to do this.
- To start you will need a CSS style sheet with the customisations you require – see below if you do not have one.
- Save the custom style sheet to a safe location, somewhere it can stay without being deleted, for example in the C:\ directory.

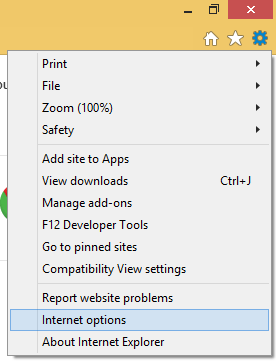
- With Internet Explorer open, click on the cog icon at the top right of the window then select ‘Internet options’
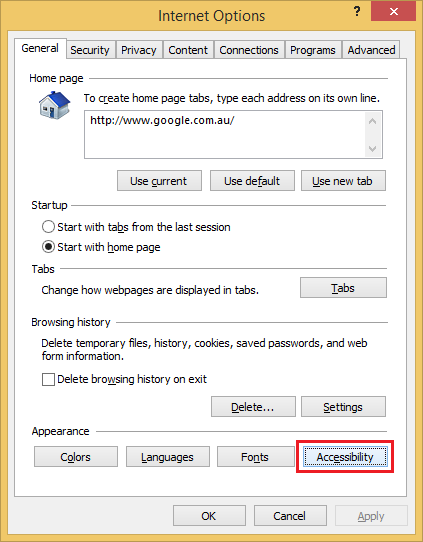
- Click on the ‘Accessibility’ button
- Place a tick next to ‘Format documents using my style sheet’
- Use the ‘Browse’ button to browse and select the custom style sheet.
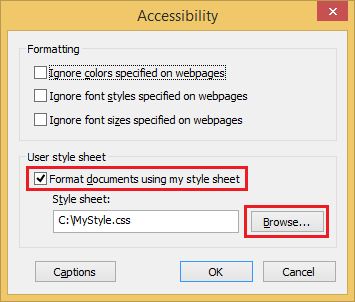
- Click ‘OK’ and ‘OK’ again to save the changes and close the windows.
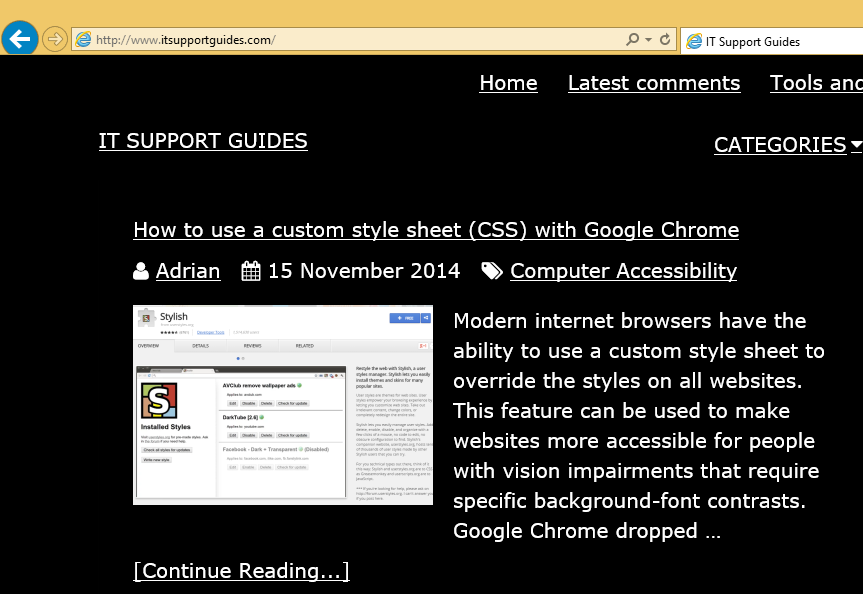
- All websites will now display using the styles specified in the MyStyles.css style sheet.
Looking for how to do with with Firefox? Check out How to use a custom style sheet (CSS) with Firefox
Example accessible CSS
Sample (right-click and choose ‘save as’): MyStyle.css
The code below has two parts-
- the asterisk that applies to all elements – the styles are black backgrond, white font and size 20px font.
- and a that applies to all links – the style makes links show with the underline, making links clearly displayed.
* {
 background: black !important;
 color: white !important;
 font-size: 20px !important;
 }
a {
 text-decoration: underline !important;
 }
Thanks this worked great, is there a way to do this for other browsers like Chrome, Edge, Firefox etc.?
Thanks for this info! I know you posted it a couple years ago, but it should come in handy. Question, though; is there a way to change this on a site-to-site basis? There’s some sites I use that I don’t want to alter the formatting of, whereas others that I do.
Hey, unfortunately it doesnt look like Internet Explorer supports CSS rules that could select particular pages or domains.
Firefox does however support a per-site CSS rule and also lets you add custom CSS – I’ve written about it here and given an example.
https://www.itsupportguides.com/computer-accessibility/how-to-use-a-custom-style-sheet-css-with-firefox/
If you’re sticking to Internet Explorer your only hope would be
inpecting the site(s) css and finding something unique to that page,
e.g. they might have a combination of classes on the body element that
is unique to them, for example:
so you would would make your CSS in the custom style sheet
body.style1.style2 aHey, no worries. I’ll try the class thing, see what I can find. Kinda stuck with IE for some tasks. :/
Thanks for the response!
Okay, so inspecting one of the sites I use, I see there’s certain elements I can definitely modify without affecting global attributes on everything else.
I’ve gone through using the DOM inspector and have found all the CSS classes I want to change. I’ve added the colors and things I want to change to a ieStyles.css file, then linked to it in the Accessibility Settings mentioned in the body of the article.
Refreshed, even restarted IE, but the styles aren’t working. Thoughts on what I can try to diagnose?
Nevermind this. I failed to notice the bit about using “!important” at first. I’ve applied that, and it’s half-working. Some styles aren’t working, but I expect that to be more related to the site I’m using than anything specific to this guide.
I’m going to keep hammering at it, I’m sure it’ll be something like style.substyle.subsub.element{customStyles !important}
It sounds like you’re on the right track and have worked it all out. As you’ve said, this is just adding your own CSS file and over-riding existing styles. The !important should help ensure it’s set, unless they’ve also used important. As with your example above, I would do both – be specific as possible and use !important. You might also want to look up the CSS specificity rules, e.g. ID’s win before classes etc.
I wanted to thank you again. I’ve got it now. Some of the trouble yesterday came from the approach I was making, which I slightly tweaked later on and yielded better results. Now, some of the only problems I have are a result of sloppy coding on the site dev’s part (“leaking” DIVs, re-using certain DIVs in places that make color-schemes difficult to manage), but nothing I can’t handle. 🙂