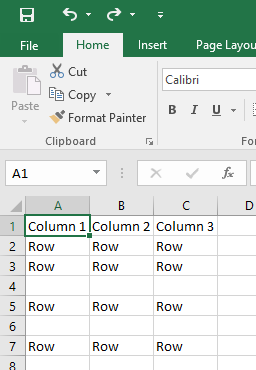
The following steps show how to remove empty rows from an Excel spreadsheet using Excel 2016.
Note: this process does not account for partially empty rows. For example if a row in column 2 was empty that row would also be deleted.
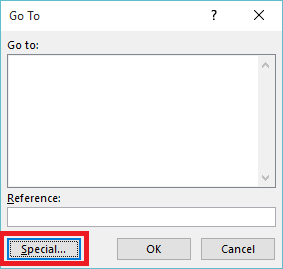
- With your spreadsheet open, press F5 on the keyboard. The ‘Go To’ window will open.
- Click on the ‘Special’ button
- Click on ‘Blanks’ then click ‘OK’
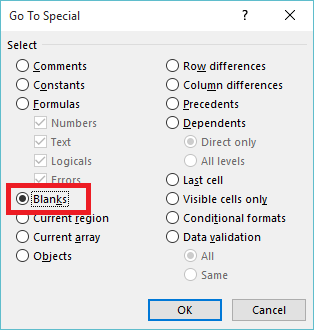
- This will select all the empty fields within your table.
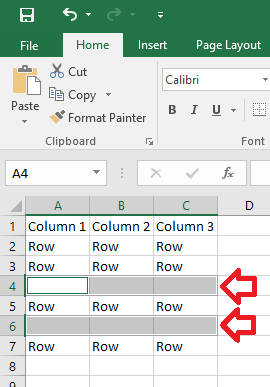
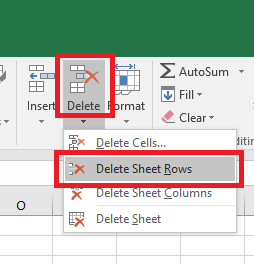
- In the ‘Home’ ribbon, click on the arrow below the ‘Delete’ button then click on ‘Delete Sheet Rows’
- Your empty rows have now been removed.
I wish this worked for me. I follow the steps, even Clear All for the blank rows, and delete the rows. Then the deleted rows are replaced with a duplicate of the problem rows. It never ends.
In my excel 2016 there’s absoultelly no way to remove rows or columns. Nor with right click not with the menu, meaning the options is there but the result is not!