If you have an integrated camera on your Windows 10 computer, such as on a laptop computer, you may be wondering how to completely disable it.
The good news is you can completely disable your camera without any special software – all you need to do is to disable the device in the ‘Device Manager’.
With the device disabled Windows (and all applications) will not be able to use your camera. You can then repeat the process to enable it again if you later need to use the camera.
How to disable your integrated web camera using the device manager
Please note: you will need administrator access on the computer to use the device manager.
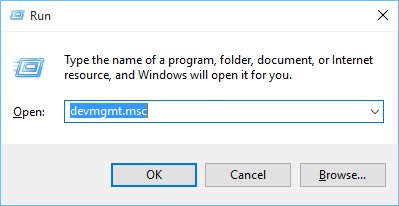
- Using your keyboard, press the Windows button + R to open the Run window
- Under ‘Open’ type devmgmt.msc and click ‘OK’
- Expand ‘Imaging devices’ to display your camera. It may be called ‘Integrated Camera’, ‘USB Camera’ or similar.
- Right-click on the device and choose ‘Disable’
- Click ‘OK’ to confirm.

- The camera is now disabled – Windows and applications will not be able to use the device.
- To re-enable it, repeat the process and choose ‘Enable’
The camera went off by itself, thanks. Be safe out there.
p.s. I just posted a comment about not being able to turn off the camera light. I just clicked Notify me via e-mail. Thank you.