The Windows 10 Creators Update introduced a new feature – ‘night light’.
With night light your the tones on your monitor will automatically adjust from a more blue light to a yellow light at night time.
For those not familiar with blue light – the theory is that it interrupts our sleep pattern making our bodies think it is still daylight. There’s more on this on Wikipedia: https://en.wikipedia.org/wiki/Effects_of_blue_lights_technology#Effects_of_blue_light_on_sleep_and_circadian_rhythm
How to enable night light in Windows 10
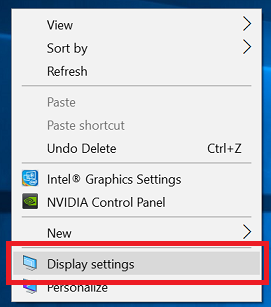
- On your desktop, right-click and choose ‘Display settings’
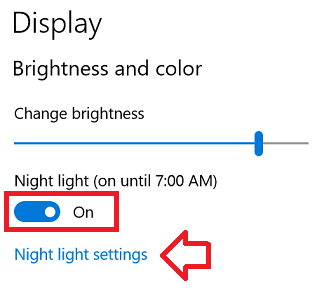
- Under ‘Brightness and color’ set ‘Night light’ to ‘On‘
- Click on ‘Night light settings’
- Here you can configure the yellow tone used when night light is enabled as well as the schedule for when it turns on and off.
- Use the ‘Color temperature at night’ bar to adjust the color tone – for my display about 80% was comfortable.
- Set ‘Schedule night light’ to ‘On’
- You can choose to automatically use the sunrise and sunset details for your current location or to manually set the times (I have location services disabled – so I need to manually set the times).
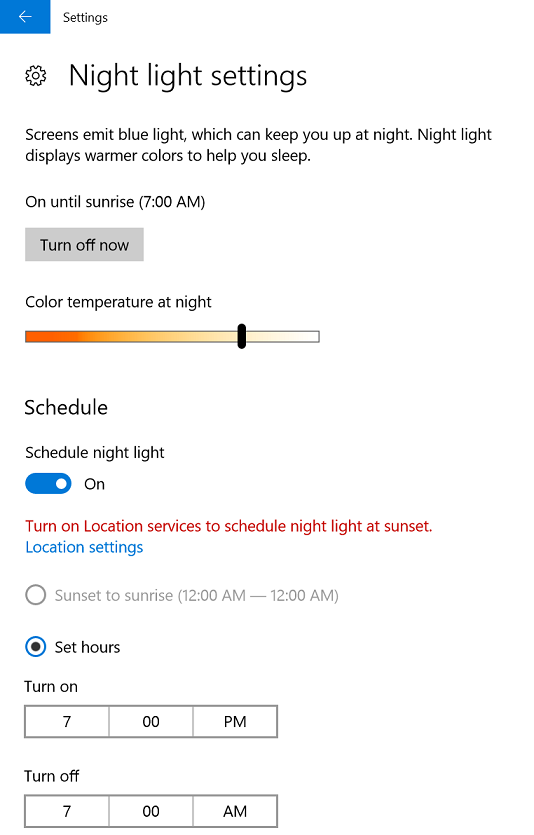
- The changes are applied as soon as they’re set – close the window when done and the night light will enable automatically as you’ve configured.