There have been some changes for how you can customise the default user profile in Windows 7.
Microsoft have disabled the standard ‘Copy Profile’ tool and will only support profile copying when done with sysprep.
On this pageJump to a section
There are a few limitations for using sysprep to copy the profile:
- If you’re using an automated ‘build and capture’ task sequence with ConfigMgr (SCCM) you’re unable to log on and make the customisations to the profile before ConfigMgr captures the image
- Some changes will not be copied. Microsoft has not documented which settings and files get copied. For example, it will not save most taskbar or start menu customisations.
Microsoft’s solution to this is using Group Policy preferences, however they’re still quite limiting and doesn’t provide complete customisation to the profile. For example, you’re unable to enable the “My Computer” icon on the desktop or specify the default background colour for new users. Another good example of the incompleteness with this method is you can change the control panel to have the ‘icon view’ however you cannot select if you want large or small icons.
After some investigation and testing I’ve found that editing the profile through targeted registry changes is the only consistent way to change the default profile. This is also a method which Microsoft will support.
The following instructions will allow you to add profile customisation to your ConfigMgr OS Deployment Task Sequence.
Changes applied:
- Force Classic Control Panel – Small icons
- Show the desktop icons for Computer, User’s Files, and Internet Explorer
- Disable Microsoft Office first run message
- Disable Microsoft Communicator First Run Tour
- Set default theme (which applies the background colour)
Step 1: Create a custom Windows 7 Theme file
- Log on to a Windows 7 computer
- Right-click on the desktop and select ‘Personalization’
- Modify the profile as desired and then click on ‘Save theme’
- Save the theme file as ‘Win7Profile.theme’
- Navigate to C:\Users\%UserName%\AppData\Local\Microsoft\Windows\Themes
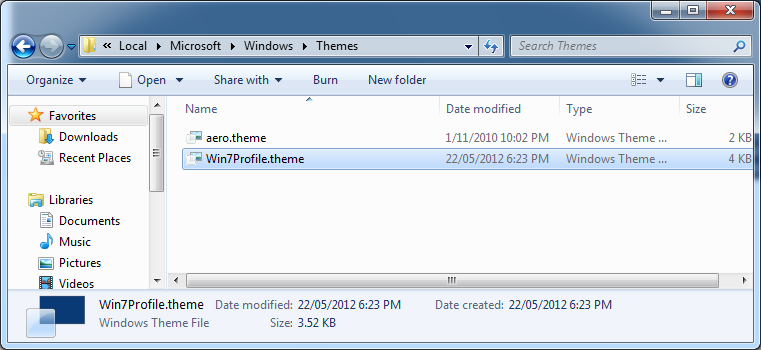
- Save the theme file to your temporary working folder, e.g. your desktop.
Step 2: Create the customisations script
REM ###################################################
REM ###################################################
REM ##
REM ## Apply customizations to Default User profile
REM ##
REM ###################################################
REM ###################################################

REM ##################
REM # Registry Edits #
REM ##################

REM **********************************
REM  Load Default User registry hive
REM **********************************
reg load HKU\DefaultUser "C:\Users\Default\ntuser.dat"

REM ******************************
REM  Force Classic Control Panel
REM ******************************
reg add "HKU\DefaultUser\Software\Microsoft\Windows\CurrentVersion\Explorer\ControlPanel" /v StartupPage /d 1 /t REG_DWORD /f
reg add "HKU\DefaultUser\Software\Microsoft\Windows\CurrentVersion\Explorer\ControlPanel" /v AllItemsIconView /d 1 /t REG_DWORD /f

REM *************************************************************************
REM Show the desktop icons for Computer, User's Files, and Internet Explorer
REM *************************************************************************
REM Show Computer icon on the desktop
REG ADD "HKU\DefaultUser\Software\Microsoft\Windows\CurrentVersion\Explorer\HideDesktopIcons\NewStartPanel" /v "{20D04FE0-3AEA-1069-A2D8-08002B30309D}" /t REG_DWORD /d 0 /f
REM Show User's Files icon on the desktop
REG ADD "HKU\DefaultUser\Software\Microsoft\Windows\CurrentVersion\Explorer\HideDesktopIcons\NewStartPanel" /v "{59031a47-3f72-44a7-89c5-5595fe6b30ee}" /t REG_DWORD /d 0 /f
REM Show Internet Explorer icon on the desktop
REG ADD "HKU\DefaultUser\Software\Microsoft\Windows\CurrentVersion\Explorer\HideDesktopIcons\NewStartPanel" /v "{871C5380-42A0-1069-A2EA-08002B30309D}" /t REG_DWORD /d 0 /f

REM *****************************************************
REM Disable Microsoft Office first run message
REM *****************************************************
reg add "HKU\DefaultUser\Software\Microsoft\Office\12.0\Common\General" /v ShownOptIn /d 1 /t REG_DWORD /f

REM *****************************************************
REM Disable Microsoft Communicator First Run Tour
REM *****************************************************
reg add "HKU\DefaultUser\Software\Microsoft\Communicator" /v TourPlayed /d "1" /t REG_DWORD /f

REM *****************************************************
REM Set default theme
REM *****************************************************
reg add "HKU\DefaultUser\Software\Policies\Microsoft\Windows\Personalization" /v Themefile /d "%systemroot%ResourcesThemesWin7Profile.theme" /t REG_SZ /f

REM ***********************************
REM  Unload Default User registry hive
REM ***********************************
reg unload HKU\DefaultUser
- In the temporary working folder, create a new text file called ‘Win7ProfileCustom.cmd’
- Add the following text
Step 3: Copy to your deployment share
To allow the ConfigMgr/SCCM task sequence to run the script you need to save it to a shared folder which can be accessed during the ‘build and capture’ process.
- Copy both of these files to your OS Deployment package on SCCM, for example in the MDT Toolkit package.
- Distribute the package to your distribution points.
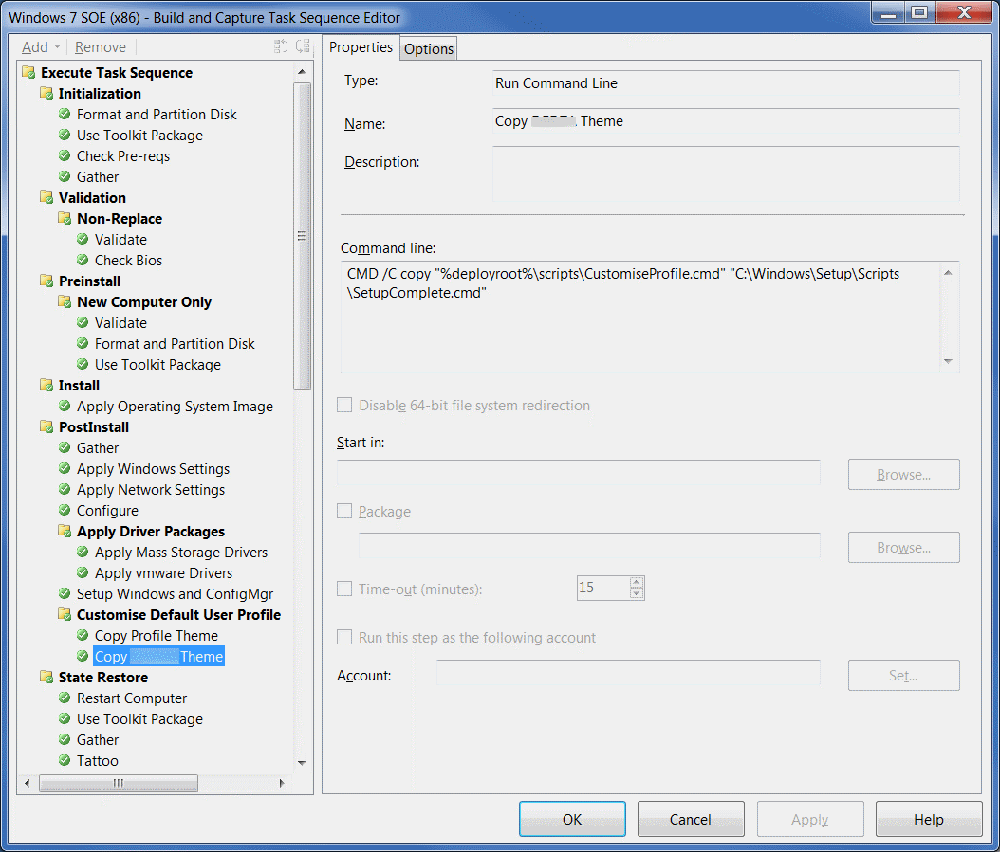
Step 4: Update your task sequence
Cmd /c copy "%osdeploymentshare%\Win7ProfileCustom.cmd" "C:\Windows\Setup\Scripts\SetupComplete.cmd"
Cmd /c copy "%osdeploymentshare%\Win7Profile.theme" "C:\Windows\Resources\Themes"
- Edit your ‘build and capture’ task sequence
- Add two new script elements, these need to be after Windows 7 and applications are installed.
- Note: if %deploymentshare% is not a valid variable in your environment you may need to specify the full share path
Step 5: Test it out
- Save the changes and run a new ‘build and capture’ to test.
Help! It’s not working!
Here are some tips to get you on your way:
- Is the script running? Try applying the customisations to a standalone Windows 7 PC. You will need to save the theme file into the C:WindowsResourcesThemes folder then run the customisations script. Log on as a new user (or a user which hasnt logged into the computer yet) and verify if the profile customisations have applied. If it has – your issue isn’t with the script, it’s at the ‘build and capture’ stage.
- Can you access the deployment share during the build and capture process? Enable the F8 support (if you haven’t already), during the build and capture process, roughly when the script is meant to run press F8 – the Windows command prompt should appear. Manually type out the two commands – is there an error message? What does it say?
- Access denied? the account does not have access to the deployment share
- File not found? did you type the command correctly? Is the command correct at all? Try running it on a standard Windows 7 system – does it work there?
| Having troubles with the instructions? Take a look at our example download:To use- extract the ZIP file and run ‘install.cmd’ as Administrator.Log on a new user (a user which hasnt logged into the computer before, and/or doesn’t have a profile already!)
Full Download: www.itsupportguides.com/downloads/Windows7CustomiseProfile.zip |
Can I use this during the OS deployment as a step in my task sequence or does it have to be during the build process? I build my images in MDT
help please 🙂
@azuberi80:disqus – you can use this in any deployment process (or even on a production workstation) – the process creates a custom theme and modifies the ‘default user’ registry hive – so once it’s setup it’ll apply for any NEW user profiles created (which i would assume wouldnt apply if roaming profiles are being used).
I carefully read your blog And it satisfied and my problems.
Actually I was searching for someone who can correct my mistake.
This Guide was really helpful for me.
thank you so much [potential spam link removed]
Hi again Dustin,
Forgive me for being vague, it’s been well over a year since I’ve had to manage the Windows 7 deployments.
From memory I did try to ‘pin’ some items to the taskbar and ‘Windows’ start menu and found it troublesome.
I think the trick was shortcuts cant be pinned, only applications?
Any how, I do think it will get quite complicated trying to do this, but here’s a step in (what appears to be) the right direction!
[url=http://blogs.technet.com/b/deploymentguys/archive/2009/04/08/pin-items-to-the-start-menu-or-windows-7-taskbar-via-script.aspx]Pin Items to the Start Menu or Windows 7 Taskbar via Script[/url]
Hey Dustin,
The first thing I would check is if the command works when you type it in manually.
Have you [url=http://www.windows-noob.com/forums/index.php?/topic/546-how-can-i-troubleshoot-windows-pe-booting-in-sccm/]enabled the F8 feature for your deployment[/url] yet?
If so, hit F8 at that stage of the deployment and try typing out the command. Take note of the error messaage.
One other thing to check is if the account running the command has access to the folder on the server. Perhaps log onto a standard workstation using the account and try running the command from an Elevated Command Prompt?
I hope you can work the problem out. This solution took some time to perfect but it resulted in us being able to deploy a perfectly customised Win 7 to our end users.
It made our deployment and training so much easier in the long run.