The following guide shows how to install a WordPress IIS test environment on your computer.
On this pageJump to a section
There are many guides that do this the hard way – installing IIS, PHP, mySQL, configuring and what not.
This guide skips all that by using Microsoft Web Platform Installer.
Step 1: Install Microsoft Web Platform
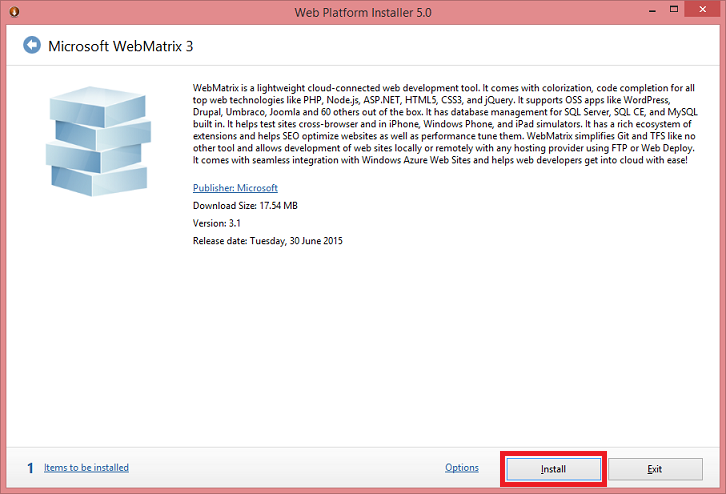
- Open the Microsoft Web Platform Installer website – www.microsoft.com/web/downloads/platform.aspx
- Download and begin the install
- Once loaded, click on the ‘Install’ button to begin
- Click ‘I Accept’
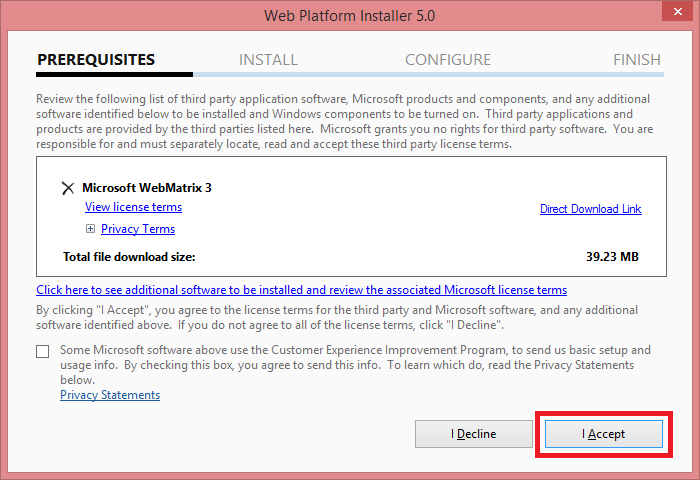
- The installer will now download and install any required components
- When done you see see a confirmation message and list of components that have been installed.
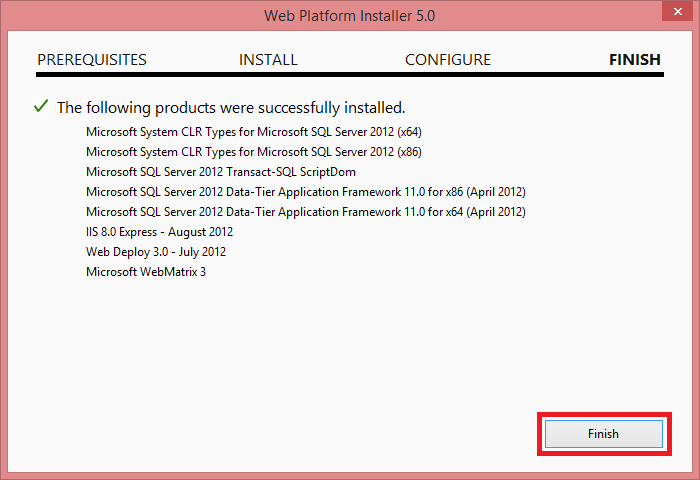
- Click ‘Finish’.
Step 2: Install WordPress
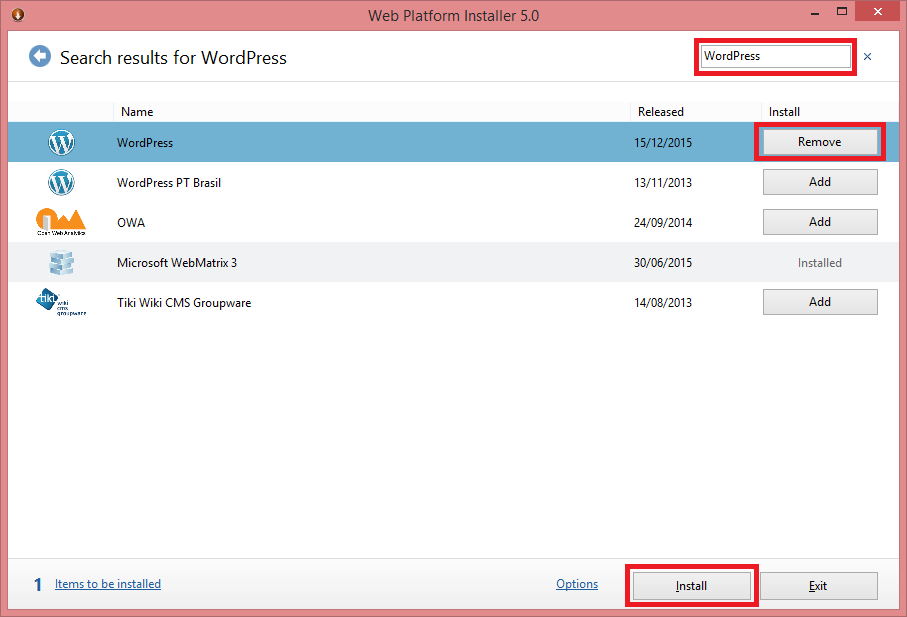
- In the window that loads, use the search box at the top right to search for ‘WordPress’
- In the search results below, click on the ‘Add’ button next to WordPress then click on the ‘Install’ button at the bottom of the window.
- Enter a password for the database user. This is not the password you use to access WordPress – it is the password WordPress uses to access the database. In a producation install of WordPress you would make this password as complicated as possible, like a random stringe of numbers, leters and characters – but given that this will be a test install of WordPress you can choose a less secure password.
- Click ‘Continue’ after entering in the database password.
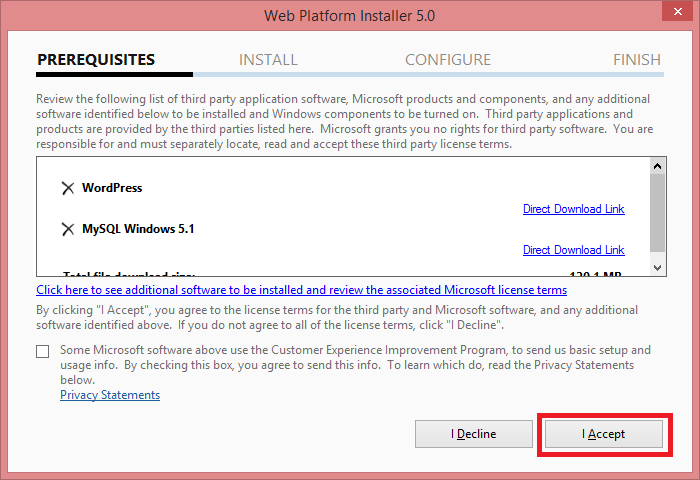
- You will now see a list of the required software to do your WordPress install.
- Click ‘I Accept’ to begin the install.
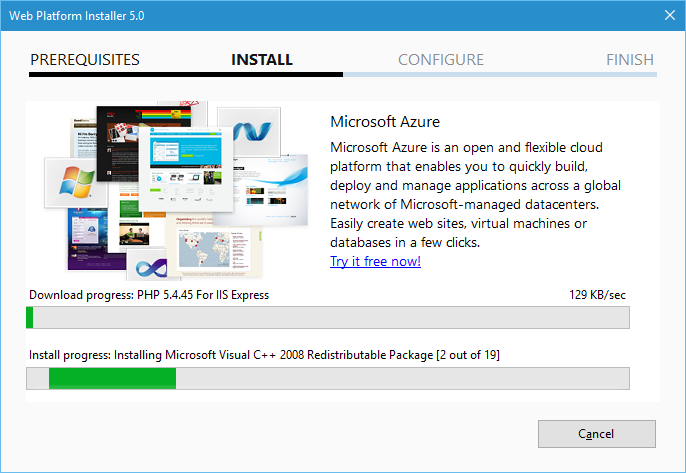
- The install will take around five minutes to complete.
Step 3: Configure WordPress
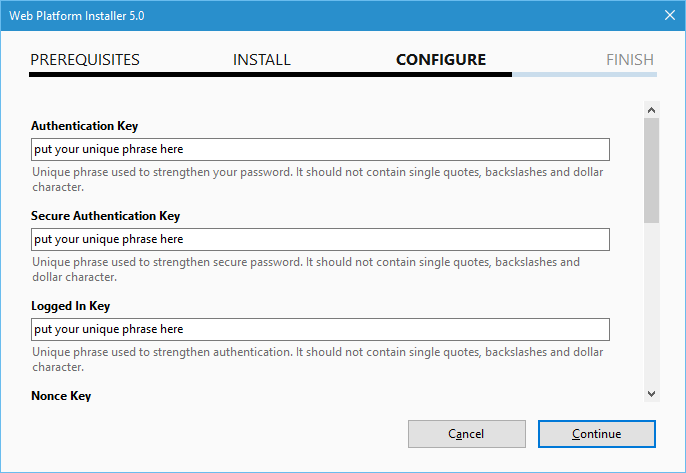
- When the install has finished the ‘Configure’ window will be displayed
- Here you can enter your unique salts that help secure WordPress passwords and communications.
- Since this is just a test environment, it’s fine to click ‘Continue’ – however you may choose to go to the WordPress salt generator website to get unique values for each of these fields.
- When WordPress has finished installing, click ‘Finish’ to close the window.
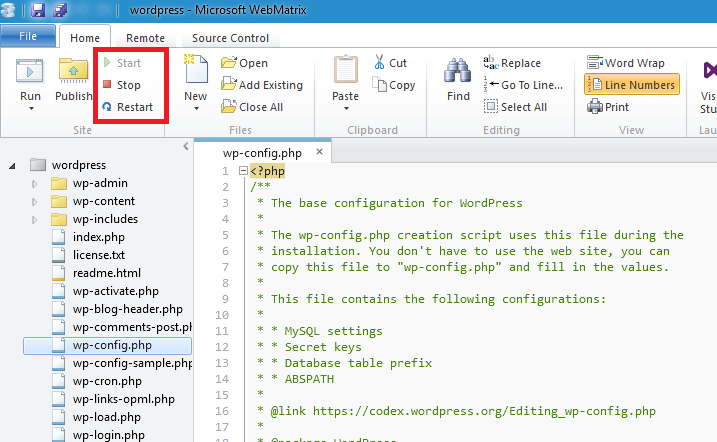
Step 4: Running your IIS WordPress install
- When the install has finished a browser window will open with WordPress ready to use.
- The WebMatrix program needs to be open for the WordPress to run
- From WebMatrix you can start, stop, restart the WordPress install and edit files using the built-in code editor.