Skip to content
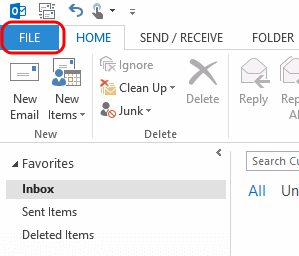
- With Outlook 2013 open, click on the ‘File’ menu

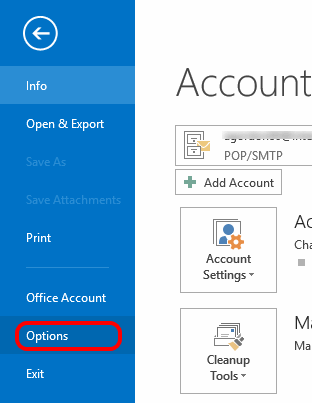
- Click on ‘Options’

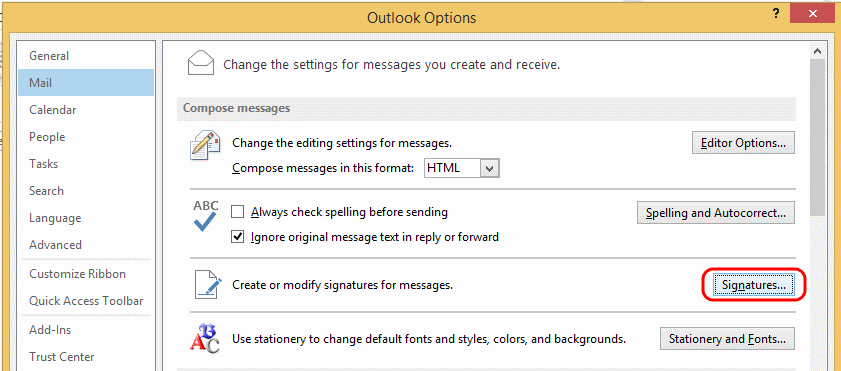
- On the left hand menu, click ‘Mail’ and then on the right click on the ‘Signatures’ button

- Click on the ‘New’ button

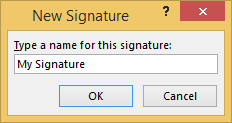
- Enter a name for the signature, this can be anything you choose. Click ‘OK’

- Using the bottom half of the window enter the details you want for your signature (or copy and paste another signature into this area).
- Make sure to select the signature using the ‘New messages’ and/or‘Replies/Forwards’ option.
- You may also want to create a different signature for the replies and forwards.

- Click ‘OK’ and ‘OK’ again to save the changes.